How to Configure NFS on Debian
NFS enables users and system administrators to mount a server’s file system partially or entirely on a client machine. Clients can then access the mounted files based on the read- and write-permissions that have been given to them.
This article will show you how you can manage the NFS server and client relation on a Debian operating system
NFS (Network File System) Server
Step 1: Installing NFS Kernel Server
Make sure your system repository index is current by running the following command in Terminal before you begin installing the NFS server:
$ sudo apt update |
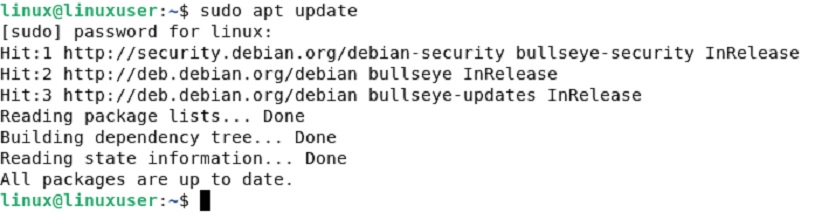
Once the update is finished, run the following command in Terminal:
$ sudo apt install nfs-kernel-server rpcbind |
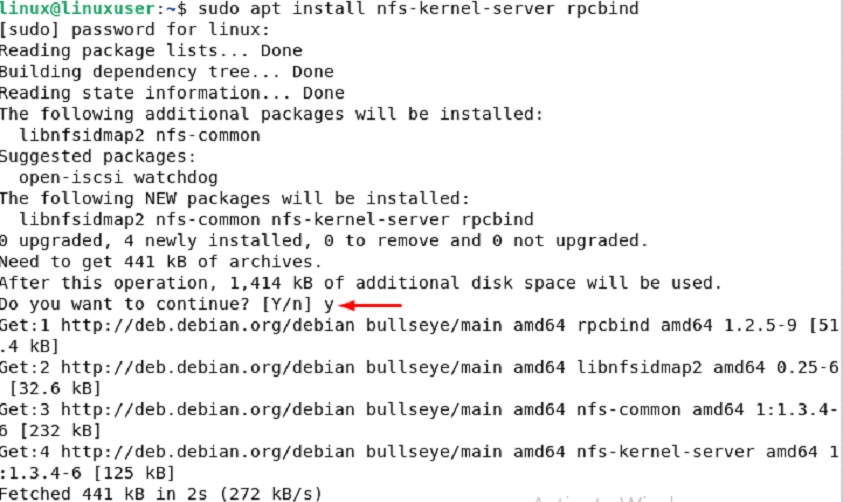
Pressing Y to start the installation on your computer after selecting Y to confirm the installation with a Y/n choice.
Step 2: Create Directory
Making an export directory that the client computers may access is the next step. You may choose any title you like. We are establishing an export directory called “sharedfolder” in the /mnt directory.
Execute the below command, being careful to provide the export directory path:
$ sudo mkdir –p /mnt/sharedfolder |

$ sudo chown nobody:nogroup /mnt/sharedfolder |
After that you need to run the chmod command to allow all the permissions as shown below:

$ sudo chmod 755 /mnt/sharedfolder |

As a result, every client will have access to the shared folder located in the mnt directory.
Step 3: Configuring Export Directory
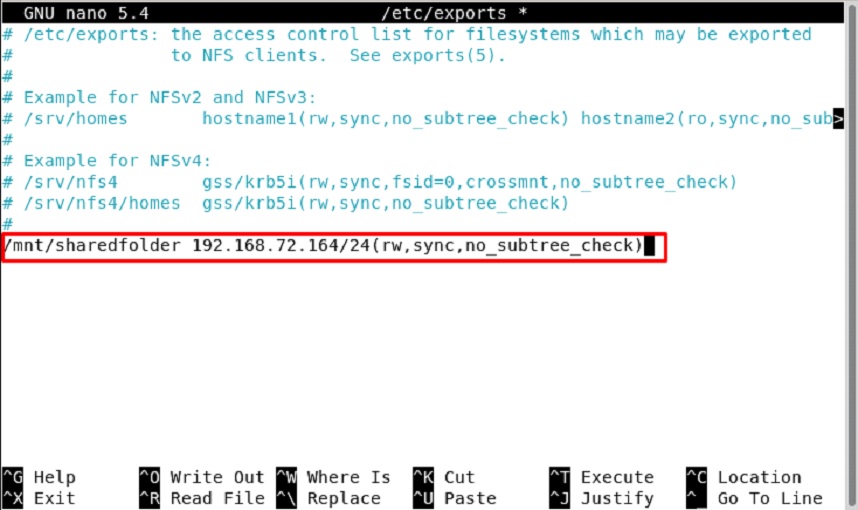
In this area, you may provide the hostnames of your customers as well as the folders you wish to share with them. To use the nano editor to make the modification in the /etc/exports file, use the following command in Terminal as sudo:
$ sudo nano /etc/exports |
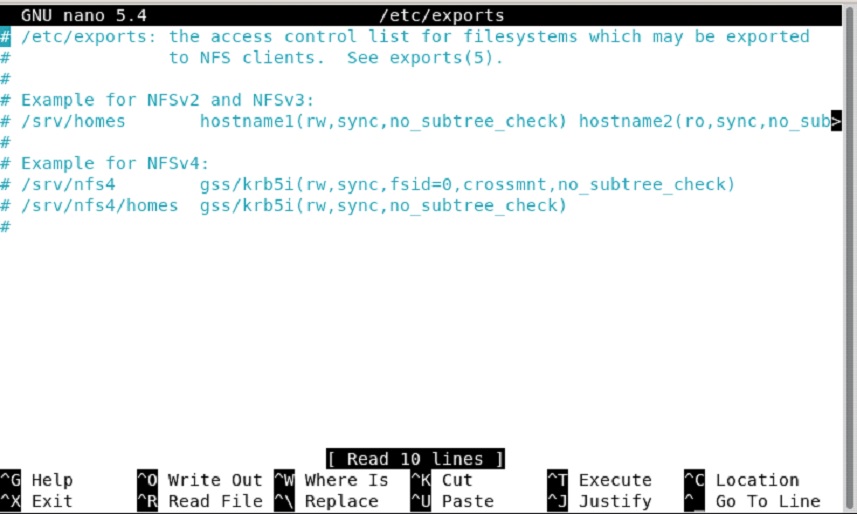
Adding the following instruction to the code will allow you to offer access to many clients by specifying a full subnet.
/mnt/sharedfolder subnetIP/24(rw,sync,no_subtree_check) |
If customers select the whole subnet, they will have access to our shared directory.
Step 4: Managing Firewall
Now it’s essential to make sure that clients can access the server and view the shared data. You must provide a rule that permits traffic from the designated clients to the NFS port.
The command “sudo apt install ufw” can be used to install nfw if it is not already installed. Use the “sudo ufw activate” command if it is also disabled and inactive. However, in our situation, these actions have already been taken.
In this instance, the whole 192.168.72.0 network will be permitted access to the NF port:
$ sudo ufw allow from 192.168.72.0/24 to any port nfs |
![]()
You can see the status of the firewall by running the following command:
$ sudo ufw status |

Now that it has been set up, our host NFS server is prepared for usage by the designated clients.
Setting Up the Client Machine
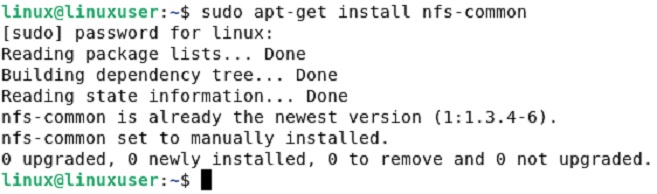
Step 1: Installing NFS Client
We used the command: to complete the nfs client installation.
$ sudo apt install nfs-common |
Step 2: Server-Side Mounting
Server-side mounting is possible by running the following command in the terminal:
$ sudo mkdir -p /mnt/sharedfolder_client |

Step 3: Client-Side Mounting
The prior phase created the mount point and now we will be mounting the NFS server’s shared directory to the mount point we previously created. This was achieved by means of the command:
$ sudo mount 192.168.72.164:/mnt/sharedfolder /mnt/sharedfolder_client |
Our NFS server’s IP address is 192.168.72.164 which has been mounted successfully on the client’s computer.

Conclusion
You can configure NFS under the Debian operating system in this article and we have talked about how to mount NFS from the client and the server.
