


Clonezilla is a full-fledged drive cloning and imaging suite in Linux. It makes the deployment and maintenance of drive images very convenient. It can even be used to deploy a single drive image on multiple computers. In this article, we will talk about the installation of Clonezilla on Linux Mint 21.
Installing Clonezilla on Linux Mint 21:
To install the Clonezilla cloning suite on a Linux Mint 21 system, you have to execute the following steps:
Step # 1: Perform a System Update:
First, you should start with the execution of the update command as shown below:
$ sudo apt update
![]()

Successful execution of this command will ensure that your system is ready for new software installation.
Step # 2: Install Clonezilla on Linux Mint 21:
After that, you can install Clonezilla on Linux Mint 21 simply by running the following command:
$ sudo apt install clonezilla
![]()

It will take around a minute or so for this command to complete its execution depending upon the speed of your Internet connection.
Step # 3: Launch Clonezilla via the Terminal:
Once Clonezilla has been successfully installed on Linux Mint 21, you can launch it with the help of the command shown below:
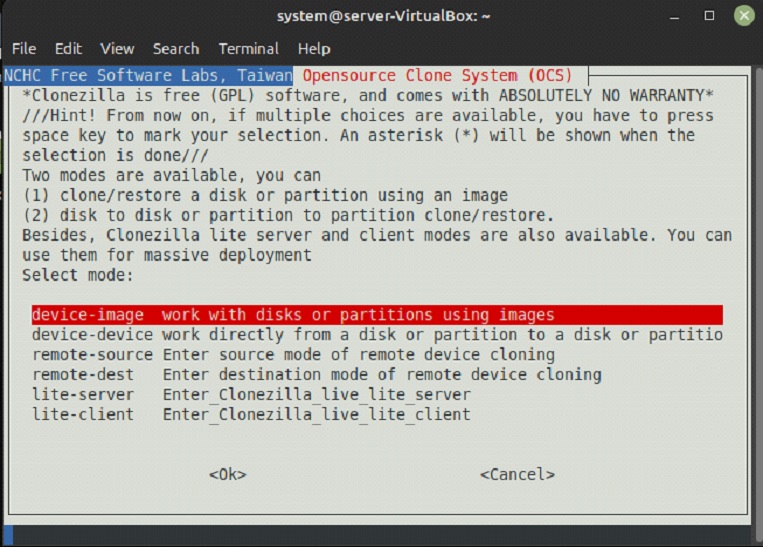
$ sudo clonezilla
Upon executing this command, you will be presented with the following dialogue box from where you can choose an option that is the most relevant for you and proceed further.

Removing Clonezilla from Linux Mint 21:
For removing the Clonezilla cloning tool from your system, you just need to run the command shown below:
$ sudo apt-get purge --autoremove clonezilla
![]()

Conclusion:
In this article, we talked about the usage of Clonezilla in Linux. After giving you a brief overview of this cloning suite, we shared with you its installation method on a Linux Mint 21 system. Now, you can easily have this tool installed on your system and you can bring it to an effective usage for drive cloning and imaging.
