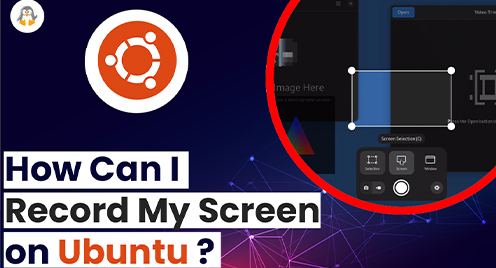
How Can I Record My Screen on Ubuntu?
Want to capture something on the Ubuntu screen? That’s crazy. Ubuntu has the option to serve you with this feature.
Screen recording or capturing is one of the tasks performed by computer users. Whether you are a student, a gaming enthusiast, or a network administrator, you have to record the screen to make notes, record the gaming sessions, or a troubleshooting guide. To do so, Ubuntu 22.04 is equipped with the default screen recorder, and it also supports some third-party recorders as well.
So, the choice is yours, we will demonstrate the way to record a screen using the default tool of Ubuntu 22.04 as well as a third-party tool as well.
Approach #1: Record Ubuntu Screen Using the Default Recorder
Ubuntu offers a combo tool that offers the screenshot and the recording functionalities. There are multiple ways to open and use it. This section lists all the possible ways to open and use the recorder.
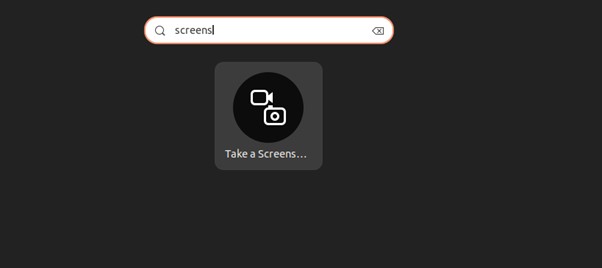
Step 1:
The screenshot tool can be invoked in one of the following ways:
1: Searching it from the applications menu as can be seen below.
2: Using the “PRTSC” button from the keyboard.
3: Using the “CTRL+SHIFT+R” from the keyboard.
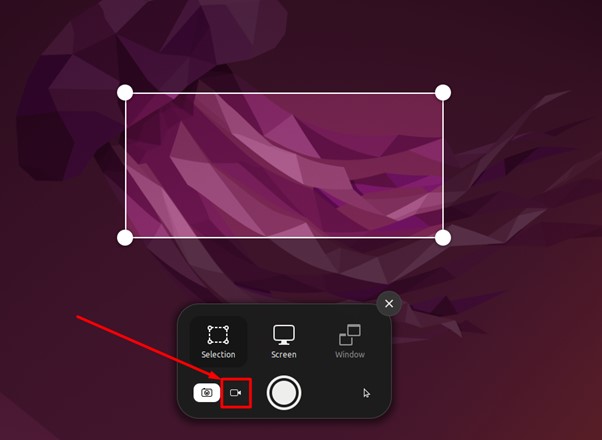
Step 2:
Once it is launched, you can click on the “video” icon as highlighted in the following image
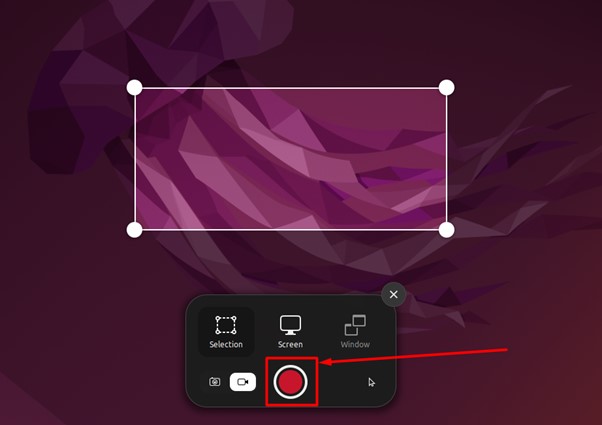
Step 3:
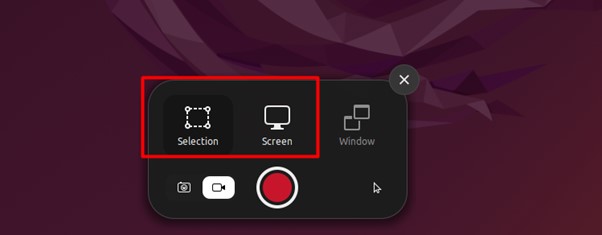
When the video button is clicked, the following red button will appear. Click on that button to start the recording.
The screen selection can be either of the following ways:
– You can either choose the specific part of the screen by clicking on the “Selection” button.
– Or select the whole screen by clicking on the “Screen” button.
Step 4:
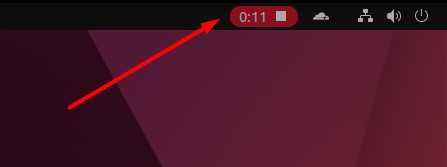
When the button is clicked, the recording will start which can be verified by the time running on the top menu bar of the main window.
Step 5:
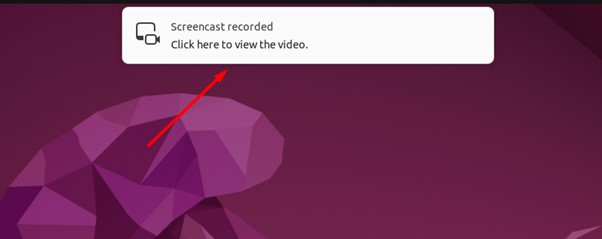
After clicking on the stop button the recording will instantly stop and it will be saved to your system automatically which can be verified by the following pop-up.
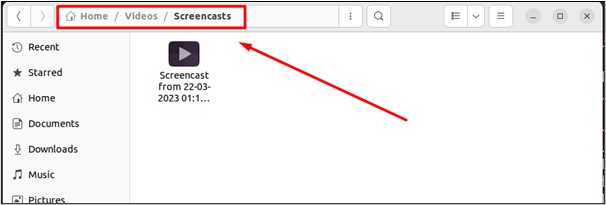
Where are the Screen Recordings Saved?
When you click on the stop button, the screen recordings are saved in the Videos folder of the Home directory. Inside the Videos folder, you will find the folder “Screencasts” where all the videos are saved as can be seen below.
The default recorder on Ubuntu is the first tool that you should consider.
Approach #2: Record Ubuntu Screen Using SimpleScreenRecorder
SimpleScreenRecorder is a free and open-source application for recording videos on your computer screen. It is designed for Linux-based systems and offers a simple interface with a variety of customizable options to record high-quality videos. First, let’s learn how to install it, then we will learn how to use it.
Installing SimpleScreenRecorder on Ubuntu
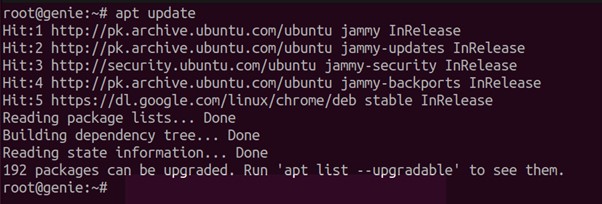
Before getting into the installation, let’s update the system’s packages using the command.
# apt update
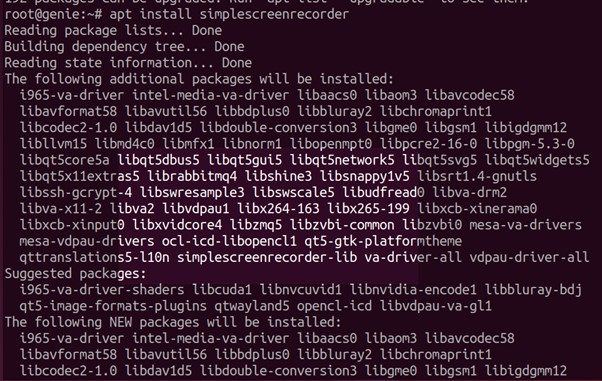
Now, run the command to install SimpleScreenRecorder on Ubuntu using the command.
# apt install simplescreenrecorder
These commands are executed as a root user. If you are not, then you need to run the commands with the sudo privileges.
Record Screen Using the SimpleScreenRecorder
Step 1:
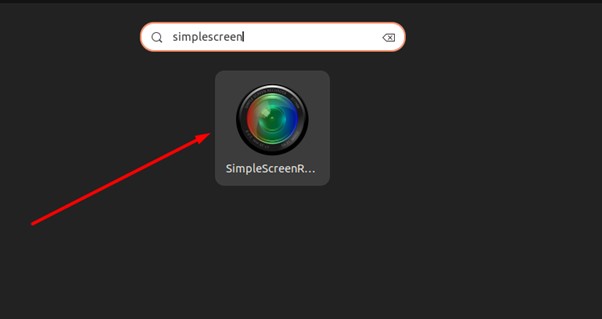
The Steps Of Screen Recording on Ubuntu using SimpleScreenRecorder can be launched from the terminal by running the following command.
# simplescreenrecorder
Or search it from the applications menu.
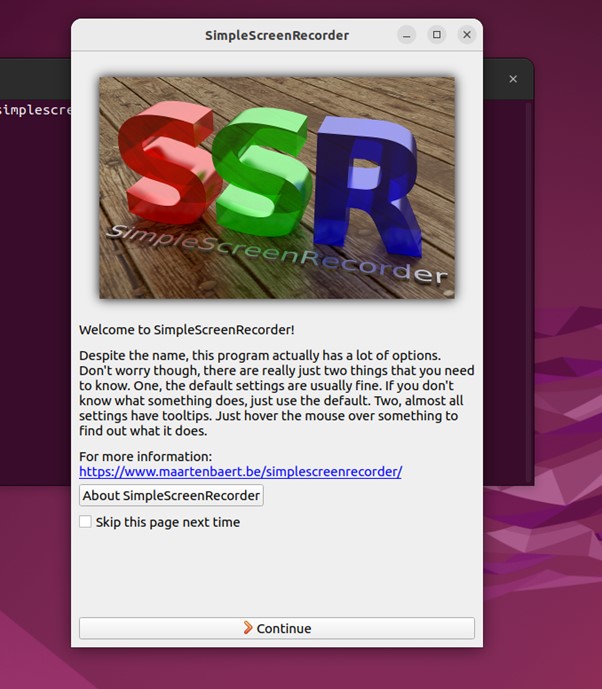
The SimpleScreenRecorder is launched as shown below. Click on the “Continue” button as shown below.
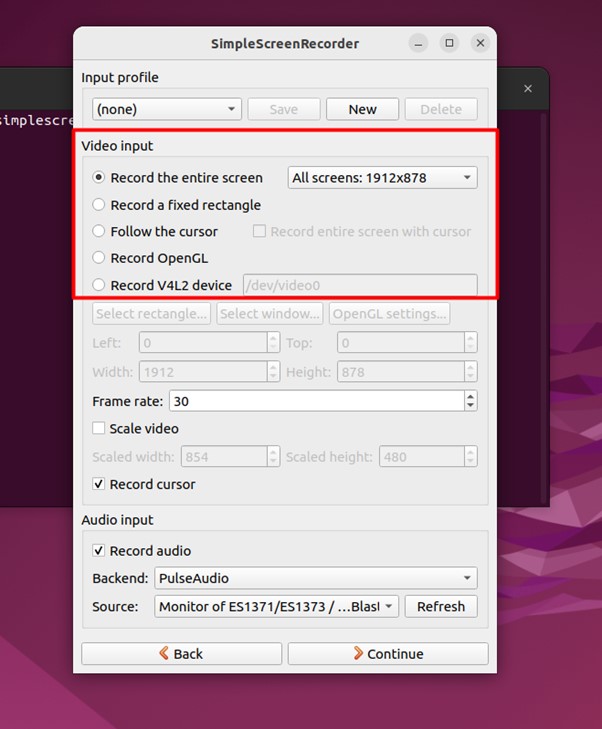
Step 2:
Here, you can set the “Input Profile” by choosing one of the following options:
– “entire screen” to capture the full screen or choose the specific screen on your Ubuntu.
– “Record a fixed rectangle” to select the specific area of the screen.
– “Follow the cursor” to record the screen with the cursor and much more as can be seen from the following window.
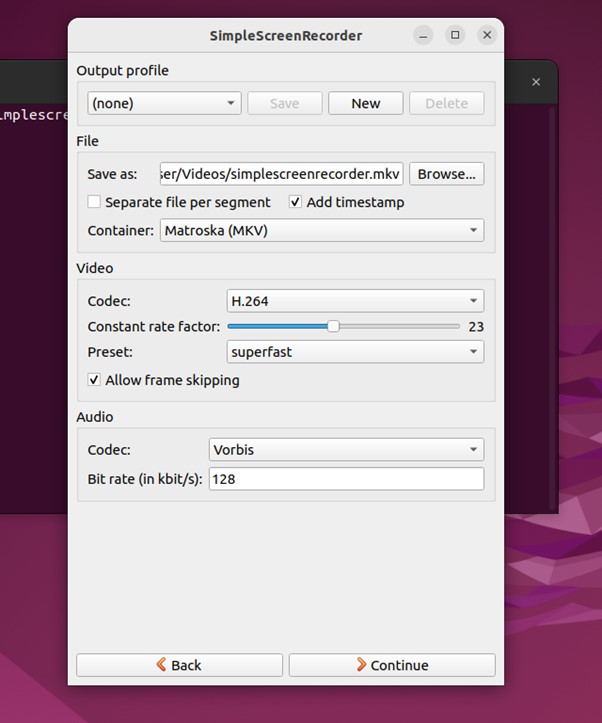
Step 3:
Once the “Input Profile” is set, you will get the “Output Profile” window which needs to be customized by keeping an eye on the following options:
– Set the path where the video will be saved.
– Choose the format of the file.
– And other settings, which can be seen in the following image.
Once all is done, click on “Continue” to proceed.
Step 4:
In the next window, click on “Start recording”. The recording will be started. When you need to stop the recording, click on the “Save recording” button and the recording will be saved in the location selected in the above step.
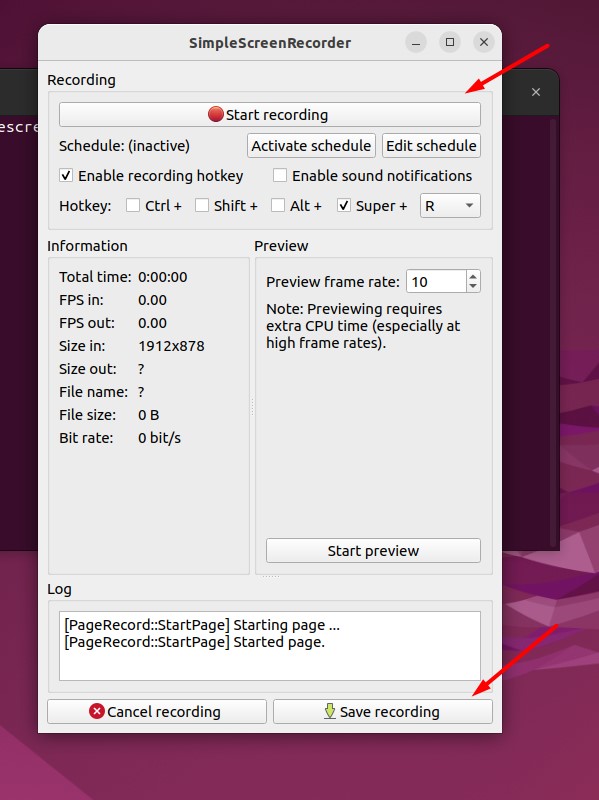
Once the recording has been stopped, you can directly navigate to the folder where the video is saved or return to the main recording screen.
Wrap-Up
The screen can be recorded by using the default screen recording tool. It is quite easy to use and offers an instant capture of the screen. Apart from that, the simplescreenrecorder, a widely used third-party recording tool can also be used whose installation and usage have been explained in this guide.
After going through this tutorial, you have learned to record screens using the default and a third-party tool.
For more Tips and Tricks on Linux, Keep Visiting LinuxGenie.
