
How to Install Perl Modules on Debian 11
In the programming world, you will come across different languages, and almost all of them have their syntax. Some have easy, while others have complicated. Pearl (now known as Perl) is one of the easiest to learn. There are Pearl modules that are the same as libraries as you see in C++ or Java, so to use them, you are to install a function related to the type of work you are doing.
This article will discuss the installation of Pearl Modules on your system in detail, and we will use Debian 11 for it.
Install Pearl Modules on Debian 11
The installation process of Pearl Modules on Debian 11 is based on the following steps.
Step 1: Update the System’s repositories
$ sudo apt-get update
You may have encountered “DLL files missing” in Windows; it is almost identical in Linux, but you can avoid this by updating your system’s repositories. This way, by executing the following command, you won’t face any errors during installation.
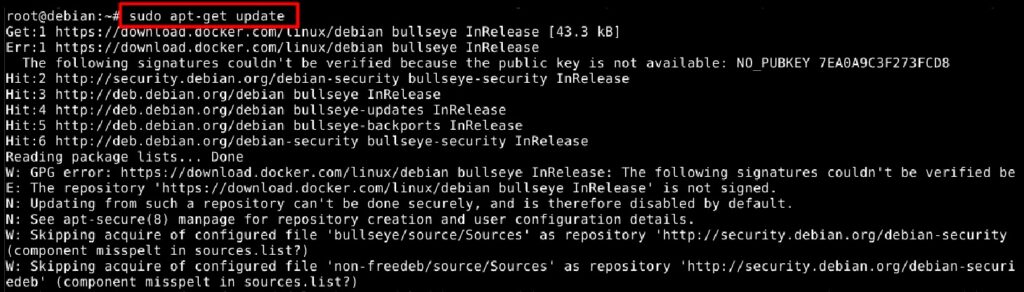
This is highly recommended by experienced users also.
Step 2: Install Pearl
$ sudo apt-get install perl
To use the Pearl Modules, you need to have the Pearl installed, which can be done by executing the following command in the terminal.

Step 3: Install CPAN
$ sudo apt-get install libpath-tiny-perl
CPAN, or Comprehensive Perl Archive Network, was first made online in 1995. Since then, it has been growing increasingly as the new Pearl Modules are added daily, and to install the required modules, you need to install them first by executing the following command.

You will be asked for permission to continue, so press the “y” key + enter key to start the process.
Step 4: Launching CPAN
The CPAN can be launched by executing this command in the terminal, resulting in a message asking for permissions about the automatic configuration. It is highly recommended not to do it manually and go with default configurations unless you know what you are doing.
It would be best to type “yes,” and the process will take a few minutes.
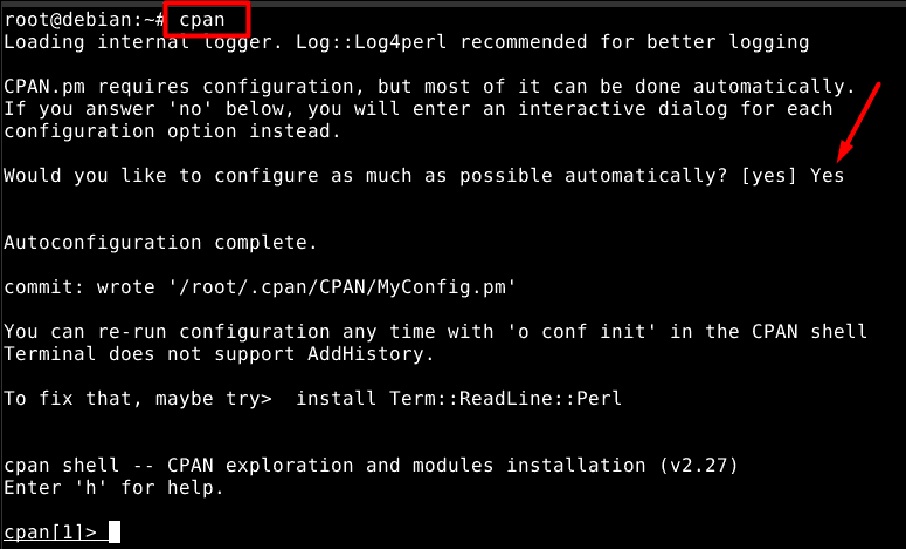
You can learn more about it by entering “h.”
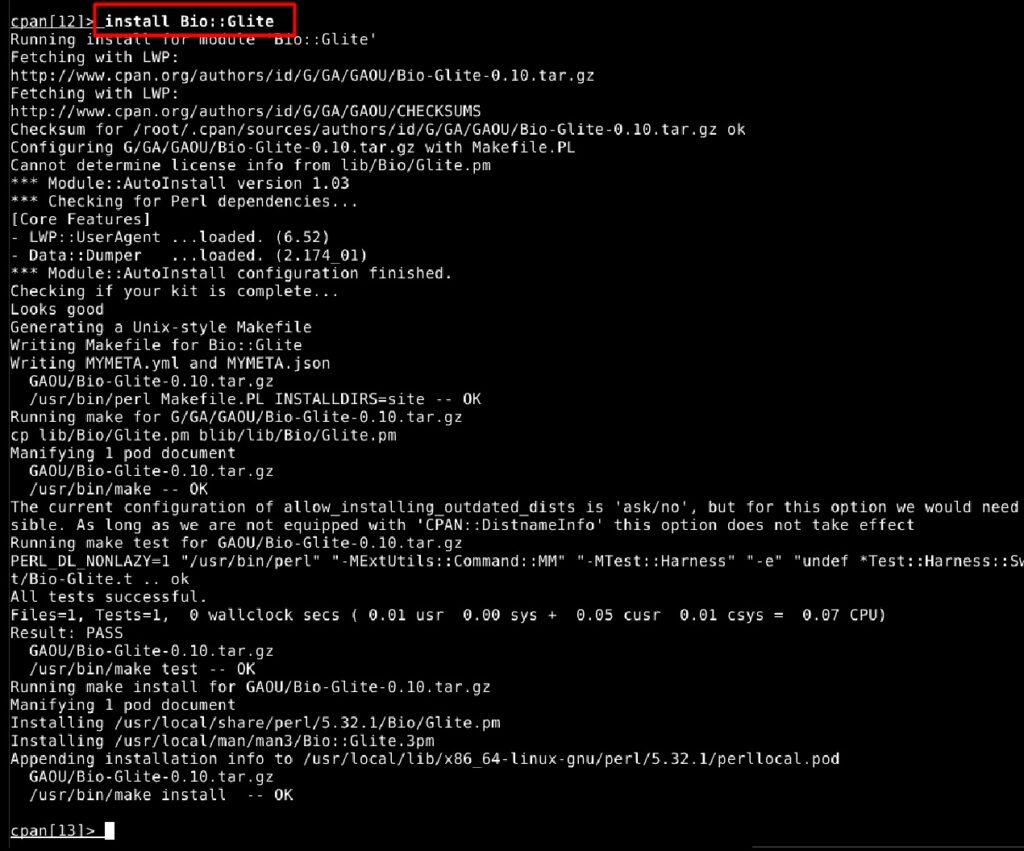
Step 5: Search and Install the required Pearl Module
> install Module::name
Once CPAN is launched, you can install all the Pearl Modules on your system, but first, you must go through their vast library on https://www.cpan.org/modules/index.html and once you have found the required module, install it by using the following format.
And the output would be like this.
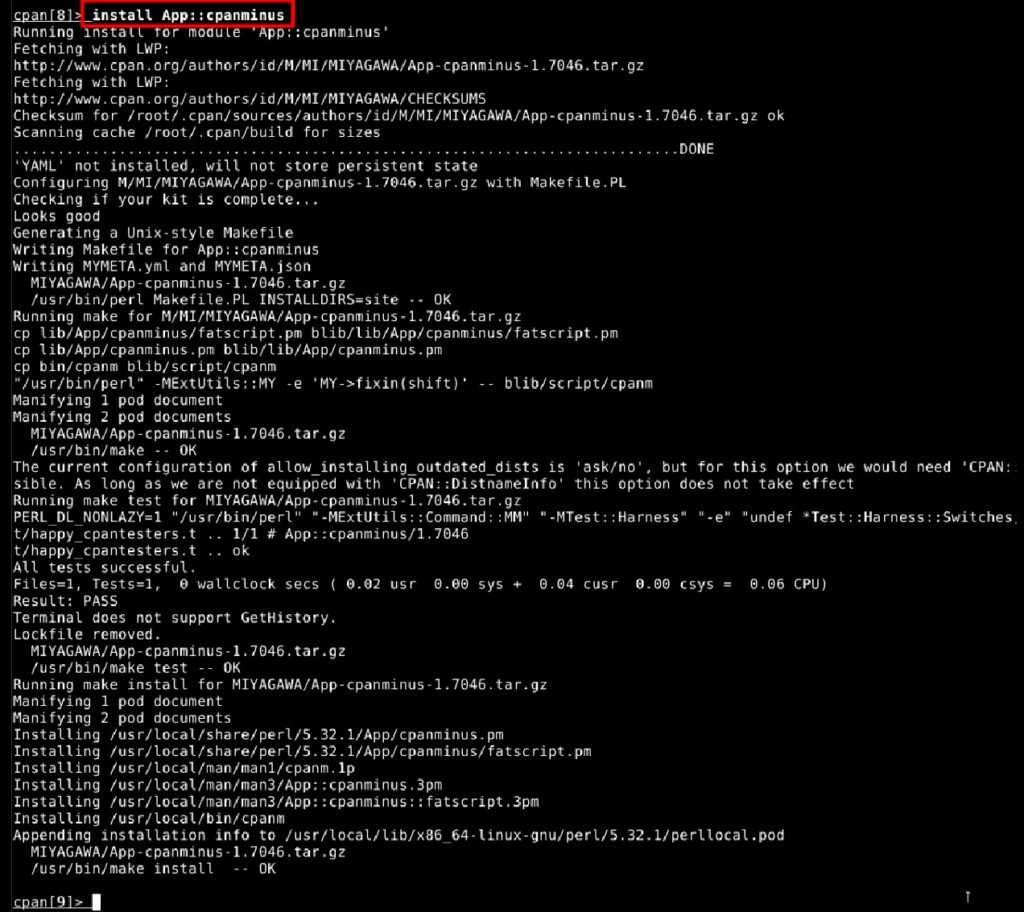
Here App is the module while “cpanminus” is the name of the module we are adding, and here is another example in which Bio is the module while “Glite” is the name of the module added.
Step 6: Close the Pearl Module Installation Wizard
The Pearl Module Wizard can be closed by typing “Exit” followed by the “Enter key,” although you can close the window if you don’t like it in this way.
In this way, you can install every module currently present, and the list is being updated constantly, making Perl a strong competitor to all the programming languages.
Conclusion
Pearl or Perl is one of the simplest high-level languages with a wide variety of modules or libraries for almost anything a computer can do. You must read the documentation, install the required module, and start using it. Today we installed two modules while explaining the whole process in detail to make it even easier for you.
