
How to Install Visual Studio Code on Ubuntu 22.04
Visual Studio Code is a free and open-source code text editor. It is a powerful and lightweight tool for building and debugging cloud and web applications. It has plenty of extensions that let you add new features, themes, and other programming languages. It runs not only on Windows but also on Linux distributions and macOS.
Let’s see how you can install Visual Studio Code (VS Code) on Ubuntu 22.04 (Jammy Jellyfish).
Installing Visual Studio Code Through DEB Package
The simplest and easiest method to install Visual Studio Code is through the DEB package provided by its official website. Follow these steps for the installation of Visual Studio Code through this method:
1. To begin with, you will need to download the DEB package of Visual Studio Code.
Download: Visual Studio Code DEB Package
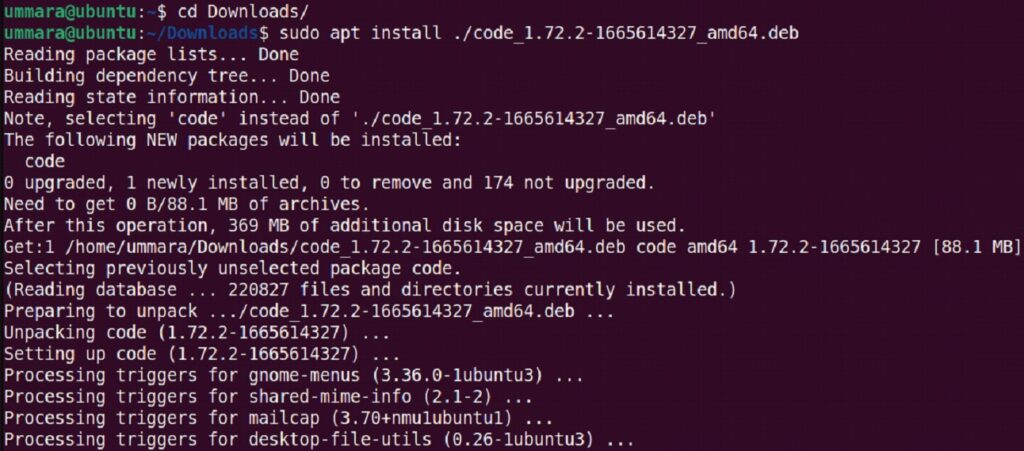
2. Move inside the Downloads directory which contains the downloaded package. Then execute the below command to install the DEB package:
$ sudo apt install ./code_1.72.2-1665614327_amd64.deb
Installing Visual Studio Code through Apt Repository
Visual Studio Code can also be installed on Ubuntu using the Apt repository. Follow the below-mentioned steps for the installation of Visual Studio Code through this method:
1. To begin with, execute the below command to install the prerequisites:
$ sudo apt install wget gpg apt-transport-https
2. Then execute the below commands to setup the key for the repository:
$ curl
https://packages.microsoft.com/keys/microsoft.asc | gpg --dearmor > packages.microsoft.gpg
$ sudo install -D -o root -g root -m 644 packages.microsoft.gpg/etc/apt/keyrings/packages.microsoft.gpg
3. Add the repository using the below command:
$ sudo sh -c 'echo "deb [arch=amd64,arm64,armhf signed-by=/etc/apt/keyrings/packages.microsoft.gpg]
https://packages.microsoft.com/repos/code stable main" > /etc/apt/sources.list.d/vscode.list'
4. Remove the GPG key file using the rm command:
$ rm -f packages.microsoft.gpg
5. Update the list of packages:
$ sudo apt update
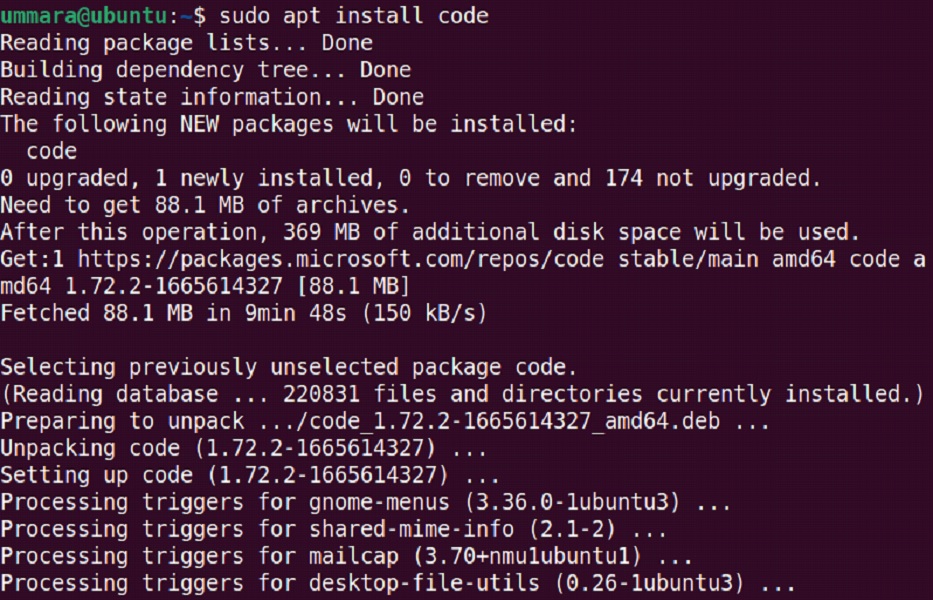
6. Now use apt to install VS Code:
$ sudo apt install code
Installing Visual Studio Code through Snap
Another way to install Visual Studio Code on Ubuntu is through the snap package. Follow these steps for the installation of Visual Studio Code through Snap:
1. Execute the below command to update the packages list in your system:
$ sudo apt update
2. If snapd is already installed, skip this step. If not, execute the below command to install it:
$ sudo apt install snapd
3. Now, execute this command to install VS Code on Ubuntu:
$ sudo snap install code --classic

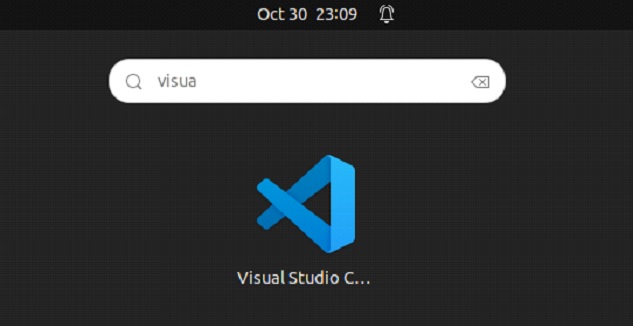
Launch Visual Studio Code
After Visual Studio Code is installed, you can launch it from Ubuntu’s Applications menu.
Uninstall Visual Studio Code
Uninstalling VS Code is also quite easy. Execute the below command to uninstall VS Code from Ubuntu:
$ sudo apt purge code
If you’ve installed VS Code via snap, execute the below command for uninstalling it:
$ sudo snap remove code
Using any of the methods described in this article, you will be able to install Visual Studio Code on Ubuntu. Visual Studio Code is not the only free-to-use code editor for Linux; there are plenty of other code editors available like Atom, Sublime Text, Brackets, etc.
