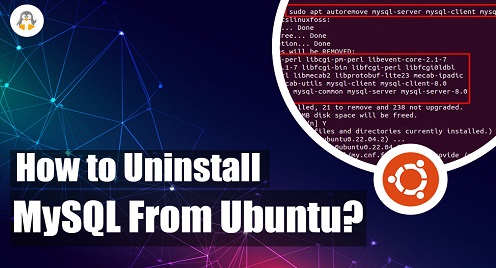
How to Uninstall MySQL From Ubuntu?
MYSQL is one of the most popular and widely used databases on the web today, used on all platforms, including Ubuntu and other Linux distributions. It is one of the most stable and practiced forms of SQL-based DBMSs.
Sometimes, the uninstallation of MySQL needs to be carried out to perform certain operations, i.e., trying to upgrade your MYSQL to the latest version or replacing the MYSQL with another database. Uninstalling MySQL is tricky sometimes because just uninstalling MYSQL won’t remove all its dependencies and configuration files. You must remove these files and folders to remove them from your system.
You don’t have to worry about it. This post will demonstrate the sequential steps to uninstall MySQL from Ubuntu.
Note: In this post, we will be using Ubuntu 22.04 for the practical demonstration of the steps.
How to Uninstall MYSQL From Ubuntu?
Before uninstallation, you should back up your files and configurations. You can do it manually if you are familiar with MYSQL or use the mysqldump utility, which will secure your data.
Step 1: Stop MYSQL Services
Before removing any application with background services, it is necessary to stop all its services before moving forward with the uninstallation process. To stop MySQL and its services, open your terminal window and run this command:
sudo systemctl stop mysql

This command will stop the services of MYSQL, and now you can safely remove the MYSQL database from your system.
Step 2: Remove the MySQL Essentials
Run this command to remove the MYSQL server, client, common, server-core, and client-core packages from your system:
sudo apt purge mysql-server mysql-client mysql-common mysql-server-core-* mysql-client-core-*
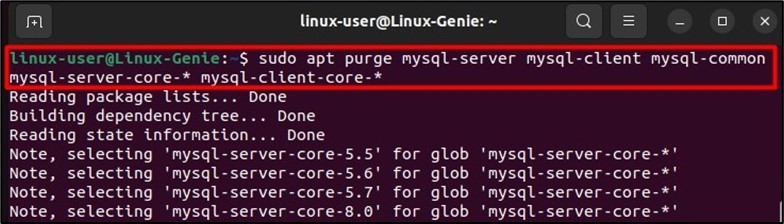
The MYSQL files are now removed from your system.
Step 3: Remove the MySQL Associated Files
Now the next step is to remove the remaining files from the folders:
sudo rm -rf /etc/mysql /var/lib/mysql /var/log/mysql
![]()
Step 4: Remove Additional Packages
This command will automatically remove the files from the folders. After this run, these commands:
sudo apt autoremove

It is recommended to clean the disk space on Ubuntu as well, using the command:
sudo apt autoclean

All the dependencies and additional files will be removed by auto-remove and auto-clean commands.
Step 5: Remove the Configurations
After this run, this command to remove the configuration, as in some cases configuration is not removed or some files are remaining on the system:
sudo apt remove dbconfig-mysql

Once all the above steps are completed, MySQL will be removed from your system completely.
How to Uninstall MySQL From CentOS/RHEL and Fedora?
Besides Ubuntu, Linux is a very wide Operating System offering numerous Linux distributions. For networking, CentOS/RHEL and Fedora-based systems are used the most. Here, we will list the steps to remove MySQL completely from CentOS/RHEL and Fedora.
Note: Before proceeding, ensure that you have stopped the MySQL services using the command:
sudo systemctl stop mysql
Step 1: Remove the MySQL Essentials
Those who are using the Centos/Red-Hat distribution of Linux or the distribution supporting yum as a package manager, use the command to remove the essential MySQL packages from the system:
sudo yum remove mysql-server mysql-client
Fedora users (using the dnf package manager) can utilize the below-mentioned commands to remove the MySQL essential packages from the system:
sudo rm -rf /etc/mysql
sudo rm -rf /var/lib/mysql
Step 2: Remove the MySQL Associated Files
Once the essentials are removed, now the users must remove the files that are now useless on the system. The commands to remove those files are listed below:
sudo rm -rf /etc/mysql
sudo rm -rf /var/lib/mysql
That’s how you can completely remove the MySQL from Ubuntu and other Linux distributions.
Wrap-Up
MySQL is one of the most used SQL-based database management systems can be removed from Ubuntu and other Linux distributions by using their respective package managers, i.e., apt for Ubuntu and yum/dnf for CentOS/Fedora.
First, you have to remove the essential installable files of MySQL, and then the MySQL-associated system files need to be deleted to complete the uninstallation process. You have learned the complete demonstration of these steps in the guide.
For more Linux tips and tricks, keep visiting and supporting Linux-Genie.
