How to Automatically Empty the Trash in Ubuntu
To keep your system clean and organized, it is important to delete unnecessary files and the items that are no longer required. When you delete a file in your Linux system, it goes to Trash and accumulates over time. Regularly emptying the trash is essential to keep your system clean and free up storage space. However, it’s easy to forget to manually empty the trash. Luckily in Ubuntu 22.04, you have the option to configure your machine to automatically empty the trash.
Method#1 Automatically Empty the Trash in Ubuntu Using Autotrash
On Ubuntu, you can automatically empty the trash using the Autotrash utility. Autotrash is not available in the Ubuntu official repositories. However, you can install it by using its snap application.
To install the Autotrash snap application, open the Terminal in your system and run the following command:
$ sudo snap install autotrash-unofficial
Provide your password for authentication and it will install Autotrash on your system.

After installation, you can launch the Autotrash utility using the following command:
$ autotrash-unofficial
If you find this command a little longer, you may set its alias simply as autotrash using:
$ sudo snap alias autotrash-unofficial autotrash
Now you would be able to launch Autotrash using the following simple command:
$ autotrash

After the Autotrash utility is installed, you can delete the content in the Trash older than x number of days. For instance, to delete content that has been in the trash for more than 5 days, you can use the following command:
$ autotrash -d 5
This feature allows you to restore any content before the specified threshold if needed.
You can also empty trash based on free space left at your Trash location. On Ubuntu, the trash folder is located at /home/username/.local/share/Trash/. For instance, you can specify Autotrash to empty the trash when the available space at the trash location falls below 1024 megabytes. Autotrash will not delete any content until it reaches this threshold.
autotrash -d 10 --max-free 1024
Method#2 Automatically Empty the Trash in Ubuntu Using Gnome Settings
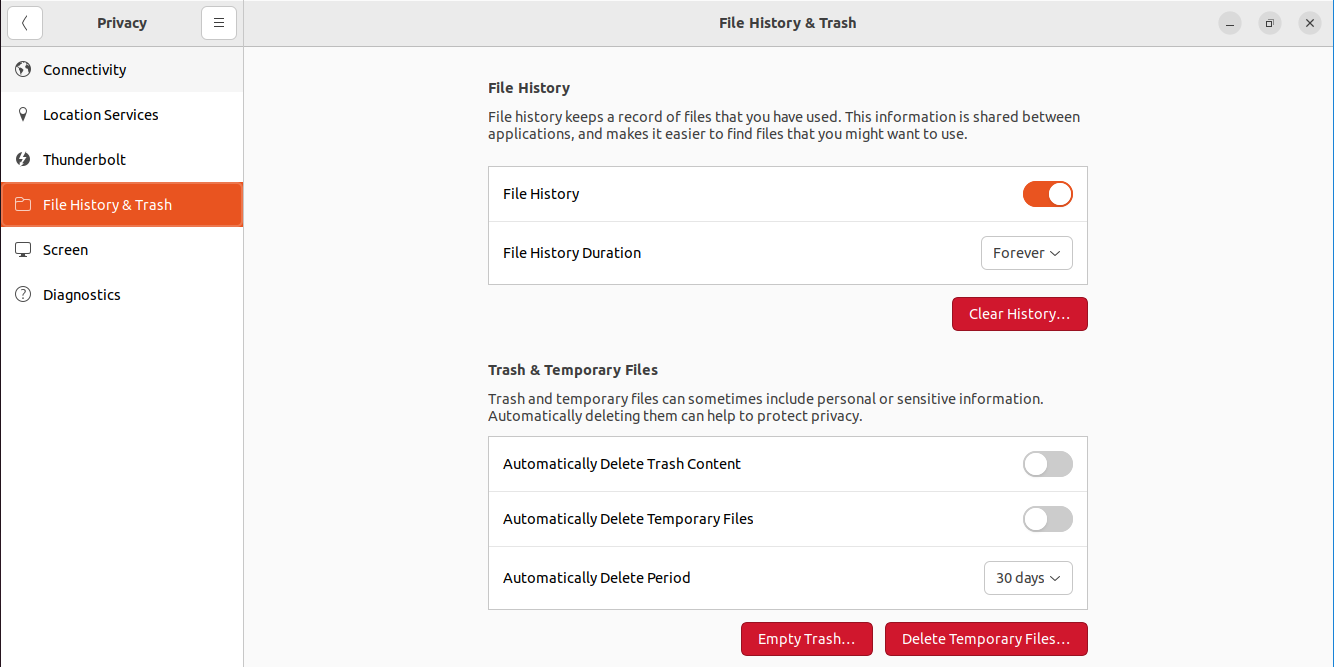
Another way to automatically empty the trash in Ubuntu is by using the Gnome Settings. Open the Settings utility from the Right-click context menu or the Activities menu. From the left tab in the Settings window, go to Privacy > File History & Trash.
Under Trash & Temporary Files, enable Automatically Delete Trash Content. You can also enable Automatically Delete Temporary Files to remove temporary files. You can also set time period based on how often you want to automatically delete the content. If you need to empty the trash right now, click the Empty Trash button.
This is how you can empty the trash automatically either through the Ubuntu settings or the Autotrash utility. These are simple yet efficient ways to save time and keep your system clutter-free.
