How to Take a Screenshot in Ubuntu 22.04
Ubuntu, one of the leading Linux distributions, does support the screenshot/snipping feature. The screenshot facility is used to capture any of the operations being performed on any part or any window of the system. Ubuntu, as always, comes up with some novel functionalities. The current LTS (Ubuntu 22.04) of Ubuntu has a built-in screenshot tool which is used to take a basic to semi-advanced screenshot.
This post will address the potential methods to take a screenshot on Ubuntu 22.04, with the following outline.
How to Take a Screenshot in Ubuntu 22.04?
Ubuntu has a built-in screen-capturing tool, and it does support various third-party utilities to take screenshots or to make a screencast. While taking the screenshots, Ubuntu does support the keyboard shortcut keys and the terminal method. Let’s start with the default tool:
Approach 1: Take a Screenshot Using the Default Tool in Ubuntu 22.04
Taking a screenshot using the default tool on Ubuntu is the recommended method. The built-in tool is easy to use and has all the basic features that a standard screenshot tool has, i.e., taking screenshots of the whole screen, specific parts, the current window, or any of the opened windows.
Prerequisites: Activate the Screenshot Feature
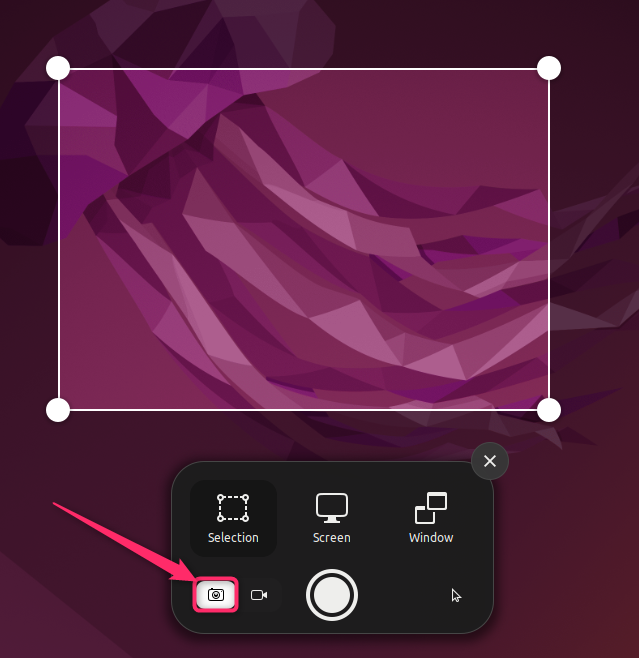
The default tool of Ubuntu comes with screenshots and screencast features. Before taking the screenshot, ensure that you have activated the screenshot feature. Open the screenshot tool and click on the picture (camera) option as shown below:
Let’s head towards the process of taking the screenshots on Ubuntu.
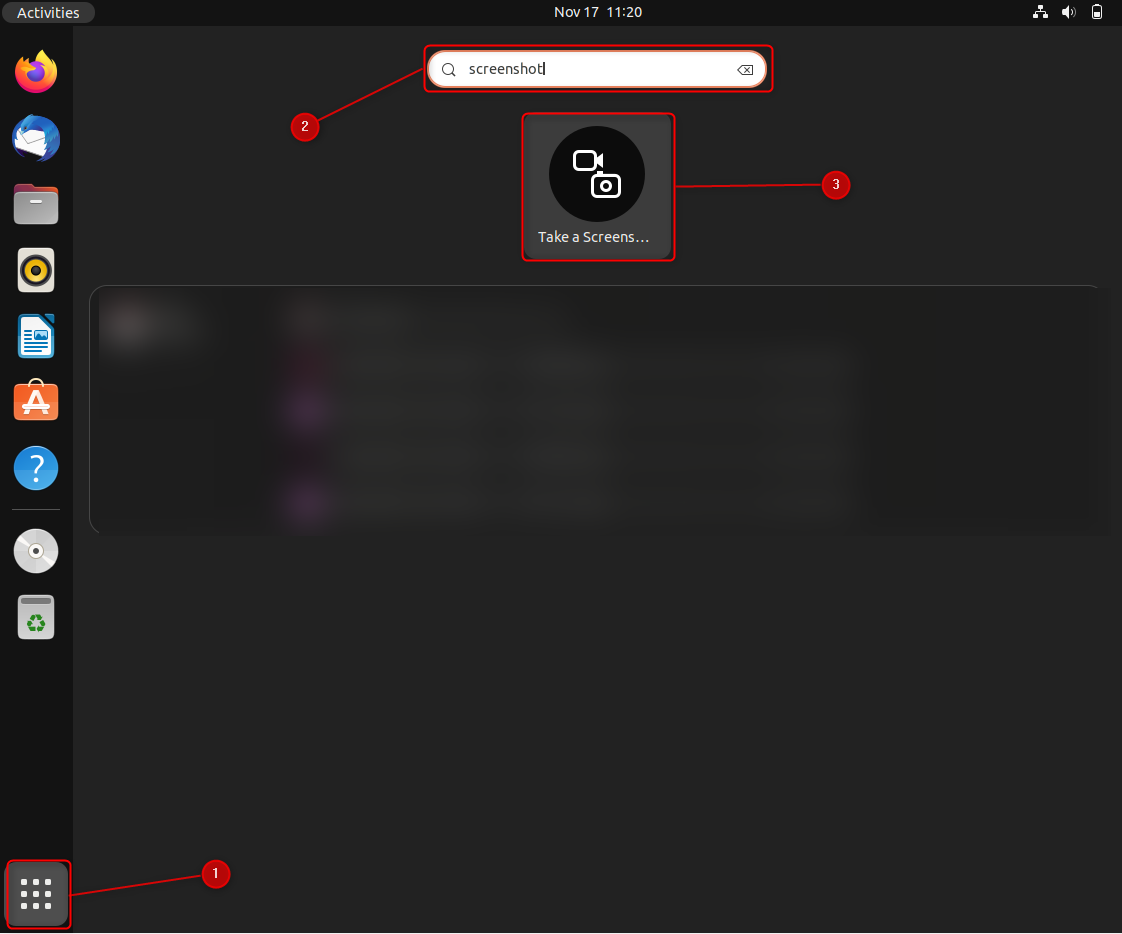
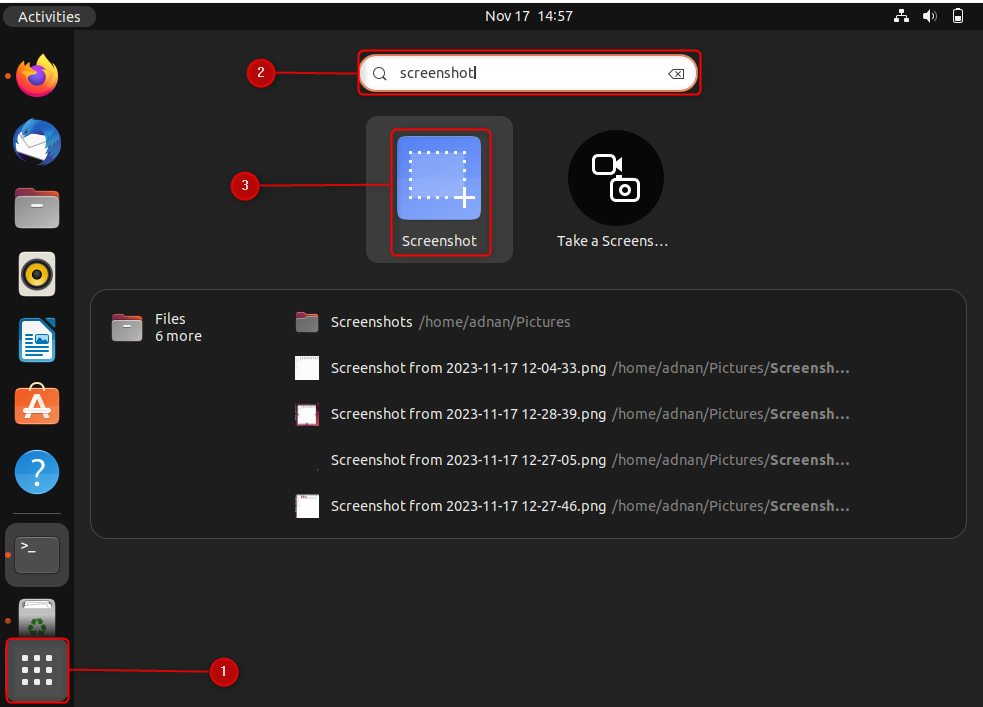
Click on the applications icon on the Ubuntu dock panel and search for screenshots. Click on the directed icon to launch the utility:
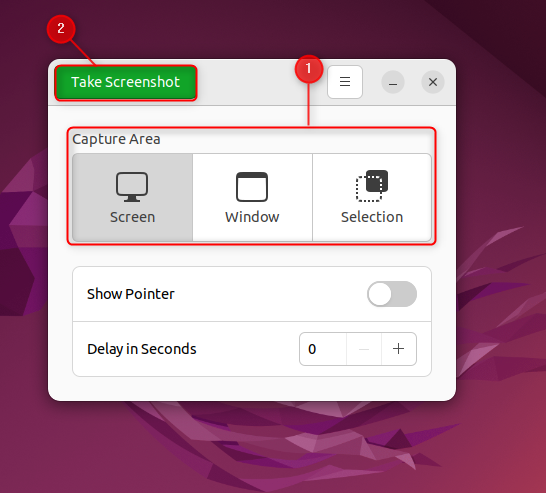
When launched, there will be three options on the tool relevant to the screenshot, i.e., Selection, Screen, and Window, as seen below:
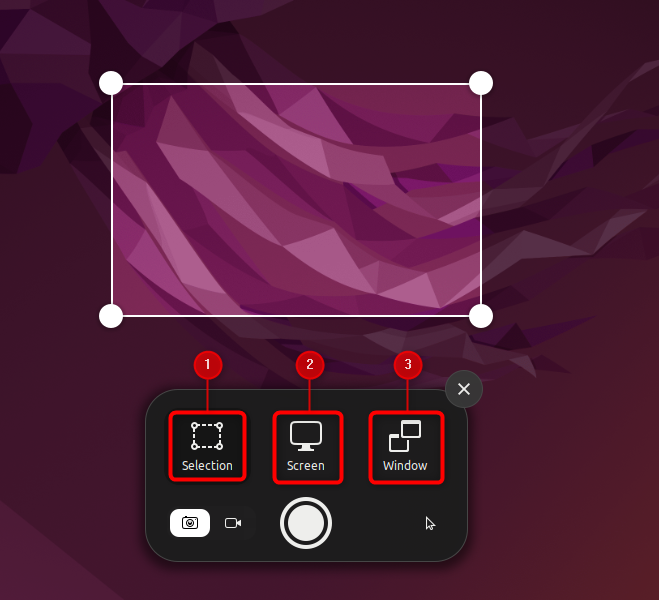
Keeping in view the above snippet, there are three possibilities to take a screenshot, which are described below:
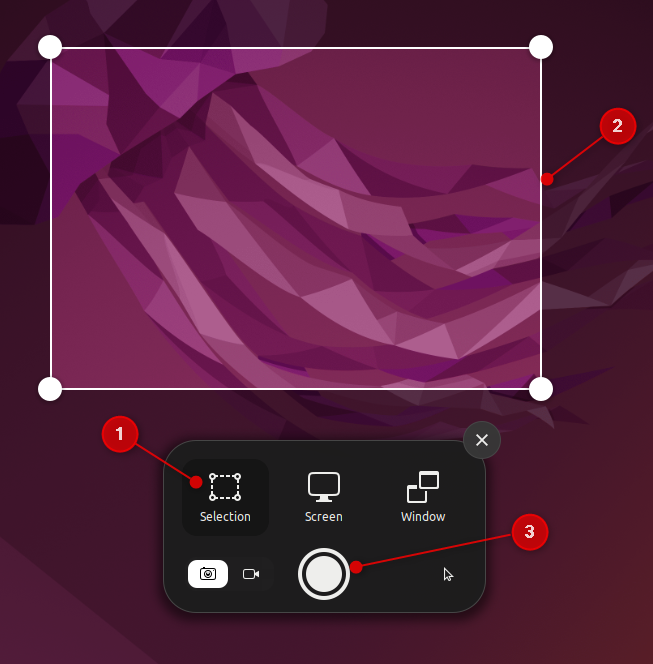
Selection | Capture the Specific Part of the Screen
Click on Selection to take the specific part of the screen. After that, adjust the screen to be captured as per your requirement. Lastly, click on the circular button to save/capture the screenshot.
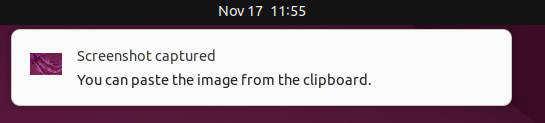
The following prompt appears at the top of the window, ensuring the screenshot has been captured. By default, the screenshot is saved to the default directory (Home/Pictures/Screenshots) and is copied to the clipboard as well:
Shortcut Key to Select the Specific Part: Press the “PRT SC” or “FN + PRT SC” (depending on the layout of the keyboard) to serve the purpose.
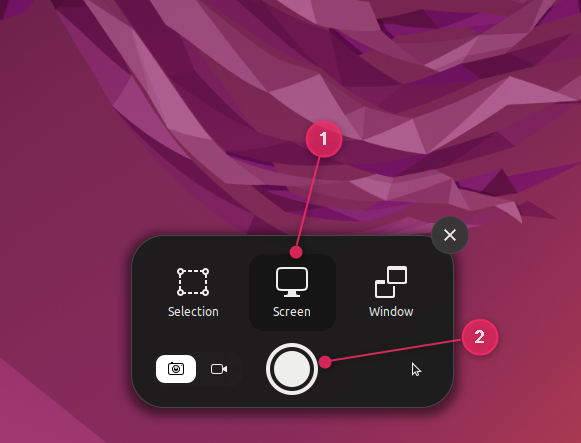
Screen | Capture the Screen as a Whole
This feature captures the whole screen instantly. Click on the Screen option and then on the capture button (circular button at the bottom of the tool).
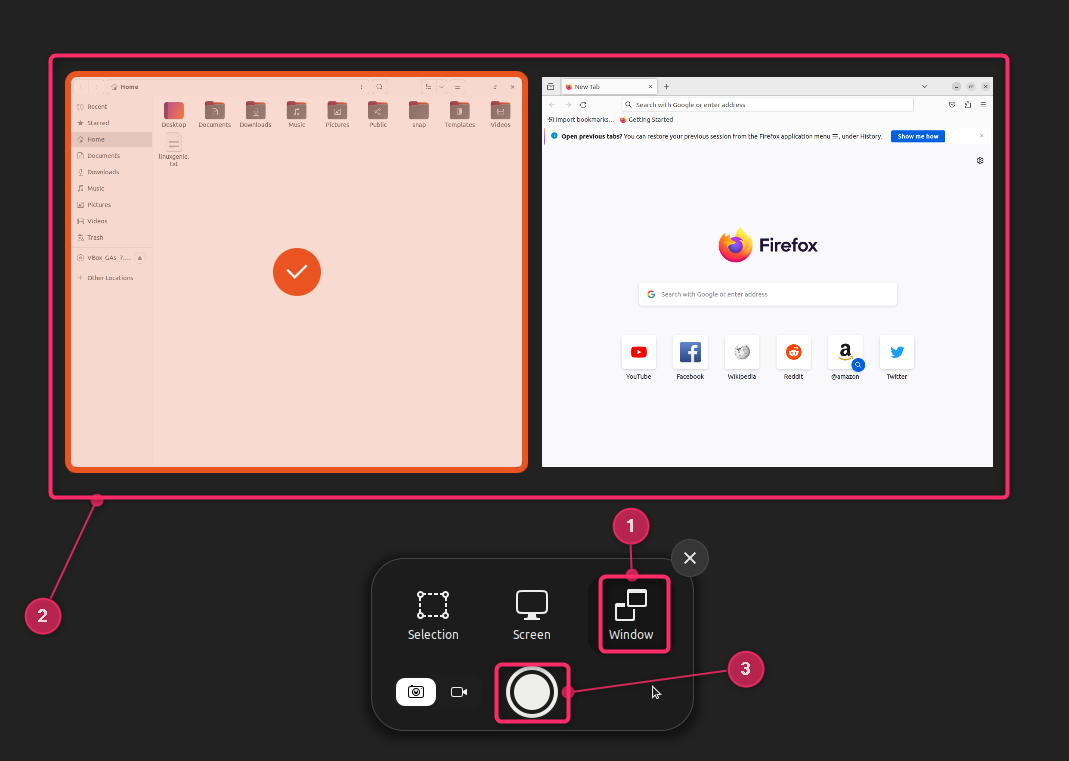
Window | Capture Any Open Window (Applicable Only When Multiple Windows are Opened)
If multiple windows are opened, this feature allows the users to capture any of the windows. Click on the Window option, select the window to be captured, and finally click on the capture button:
Approach 2: Take a Screenshot Using Other Than Default Tools in Ubuntu 22.04
Apart from relying on the default screenshot utility, Ubuntu supports various tools that are present in the official repository of Ubuntu. Let’s dig out and learn about the three best tools to take screenshots on Linux:
GNOME Screenshot
GNOME Screenshot came by default with earlier distributions of Ubuntu. However, it was replaced with the better and quick screenshot utility (used in Ubuntu nowadays). Let’s see how it can be installed:
How to Install GNOME Screenshot Tool on Ubuntu 22.04?
Use the command to update the packages list to load the latest available version of GNOME-Screenshot:
$ sudo apt update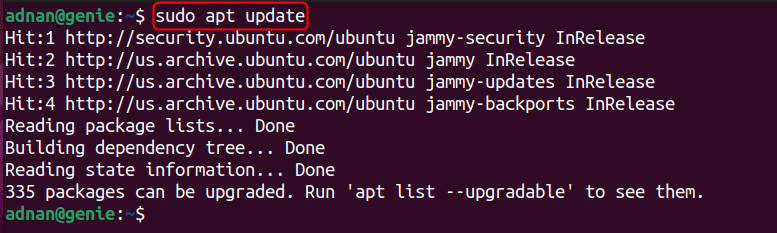
Now, you can easily install the GNOME screenshot utility via the command:
$ sudo apt install gnome-screenshot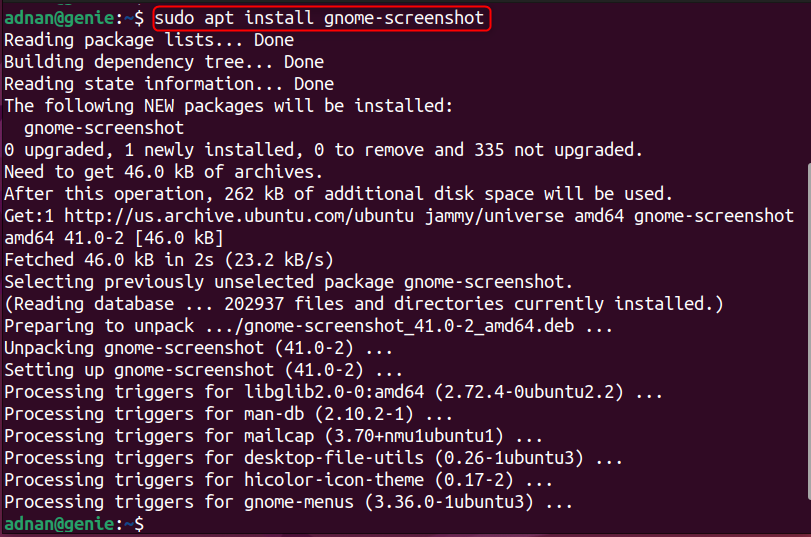
How to Take a Screenshot Using GNOME-Screenshot on Ubuntu 22.04?
To launch the GNOME screenshot utility, search for it in the applications menu:
Once opened, here’s how it is used:
- Choose your desired operation, i.e., Screen, Window, or Selection.
- Then, Click on the Take Screenshot button.
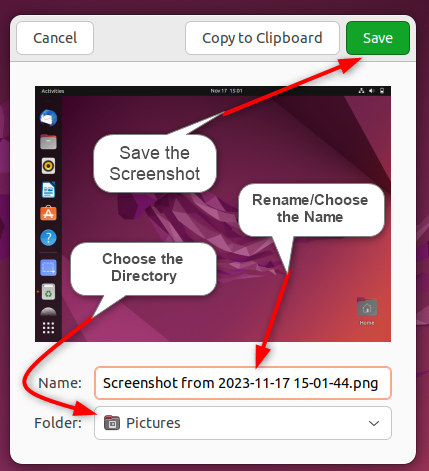
Upon clicking the Take Screenshot button, the following window appears where you can:
- Choose the directory to save the screenshot.
- Rename/Choose the name of the screenshot.
- Lastly, click the Save button to save the screenshot with the chosen name and location.
That’s how the GNOME screenshot tool works.
Want to remove it? Here’s how it can be done:
$ sudo apt autoremove gnome-screenshot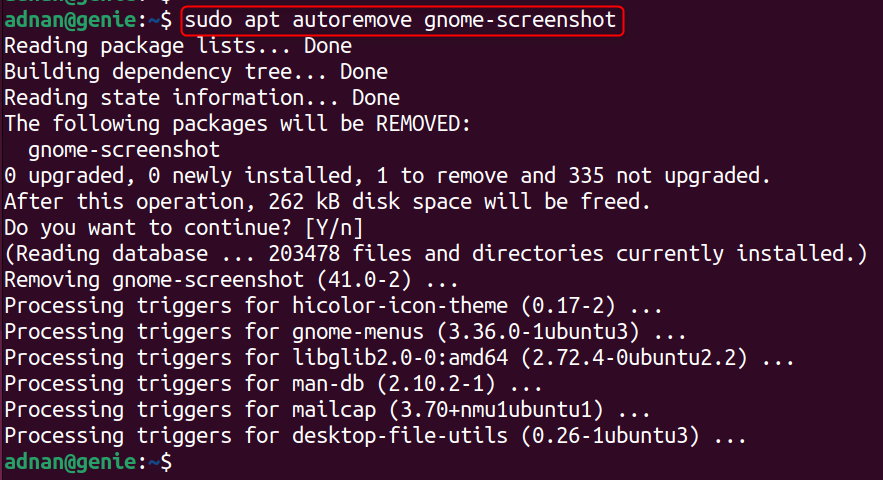
Flameshot
Flameshot is another feature-enriched and easy-to-use screenshot/screencast tool supported by Ubuntu. Let’s go through its installation first:
How to Install Flameshot on Ubuntu 22.04?
Flameshot is available on the official repository of Ubuntu and thus can be installed using the apt package manager using the command:
$ sudo apt install flameshot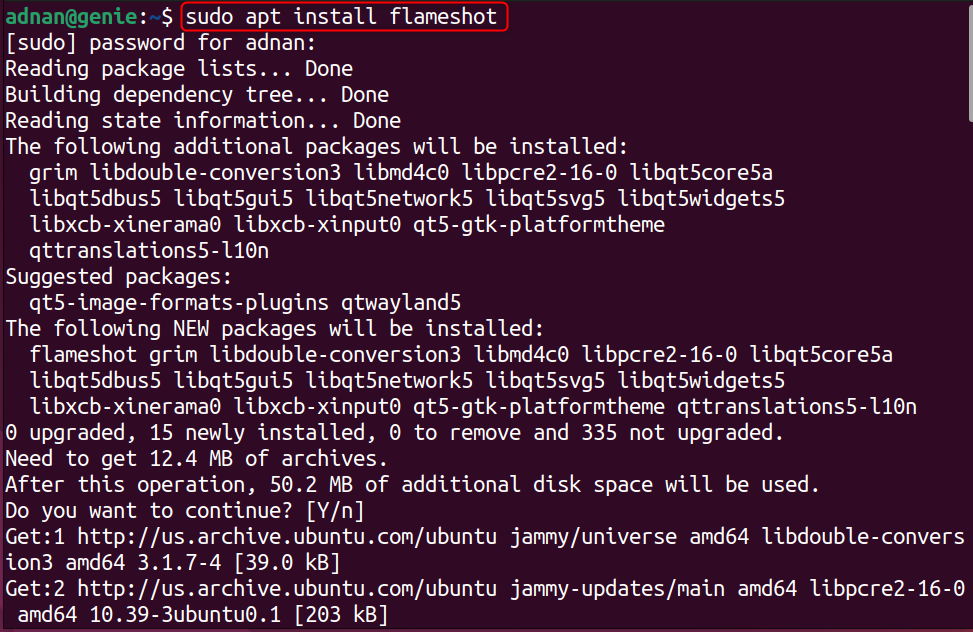
How to Take a Screenshot Using Flameshot on Ubuntu 22.04?
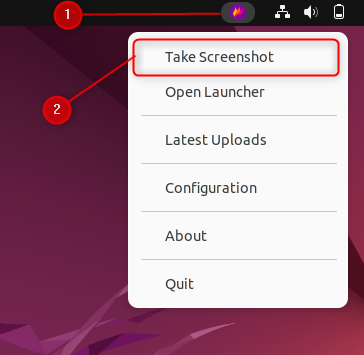
Launch it from the Ubuntu’s applications menu. The icon appears at the top (highlighted in the below image). Click on it and then on the Take Screenshot option:
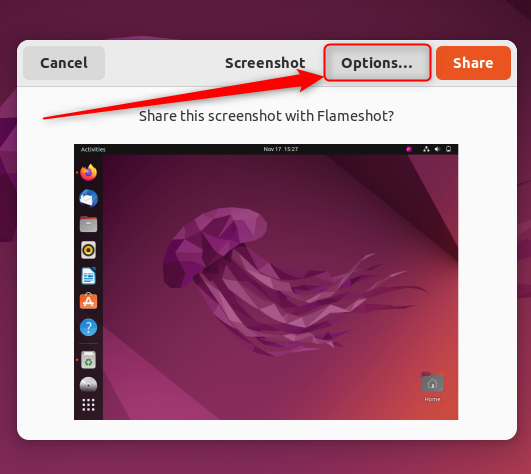
It flashes and captures the entire screen and then opens up the following prompt. Click on the Options:
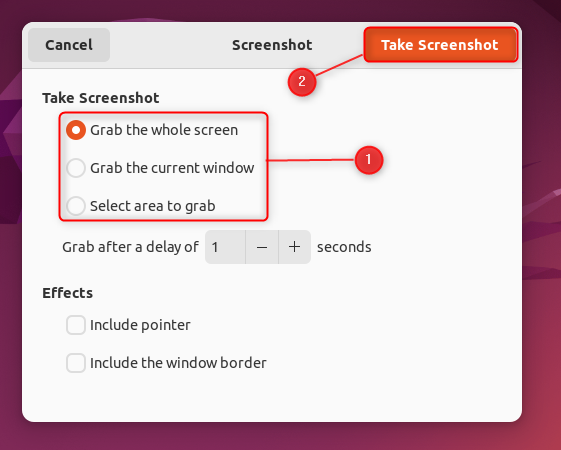
Here:
- The whole screen feature captures the entire screen.
- The current window captures only the current window.
- The area to grab takes screenshots per your choice.
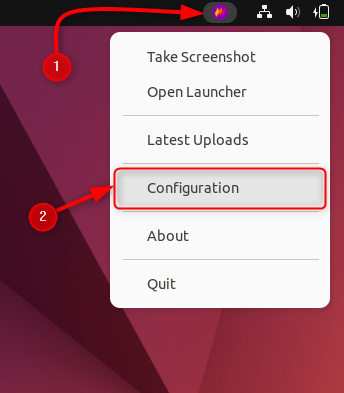
Moreover, you can configure the settings of the flameshot to get the screenshot in a customized manner. Click on the flameshot icon and then choose the Configuration option:
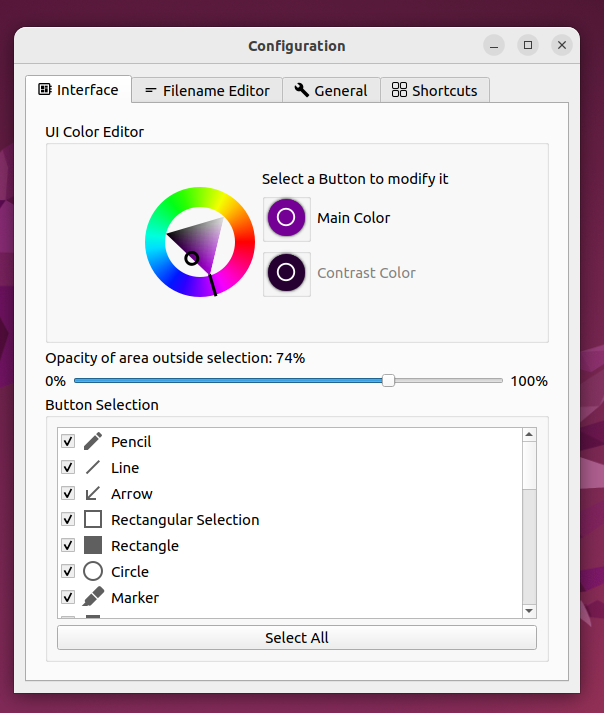
The configuration window will appear carrying the tens of options that the users can optimize to enhance their user experience:
If you do not want to keep it, you can uninstall it using the command:
$ sudo apt autoremove flameshot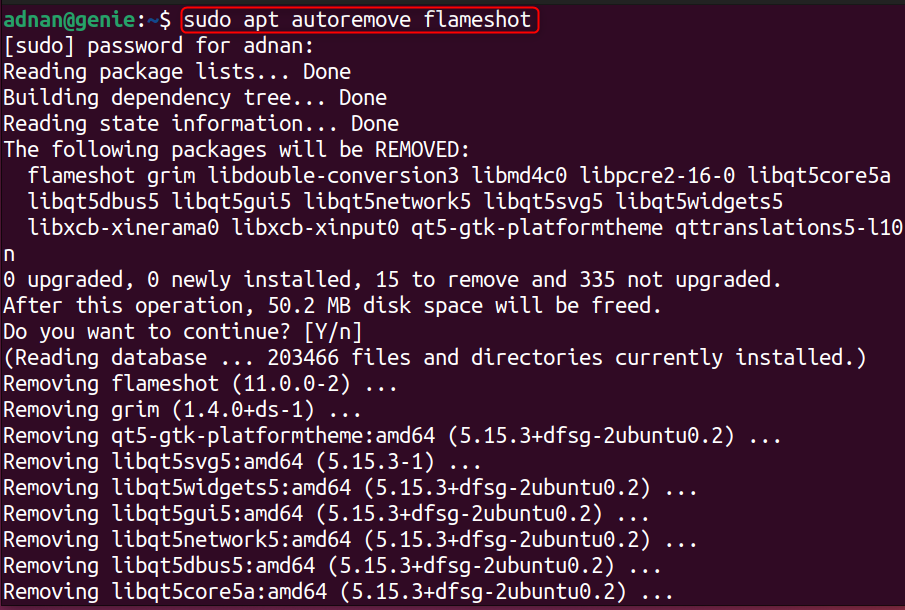
Kazam
Kazam, a utility known for its screencast features also has simple yet descriptive screenshot support. It has all the basic to advanced features that a screenshot utility must have. Let’s see how it can be installed and used to take screenshots:
How to Install Kazam on Ubuntu?
Kazam exists in the official repository of Ubuntu and can be installed with the following command (make sure to update the packages list with the command “$ sudo apt update”):
$ sudo apt install kazam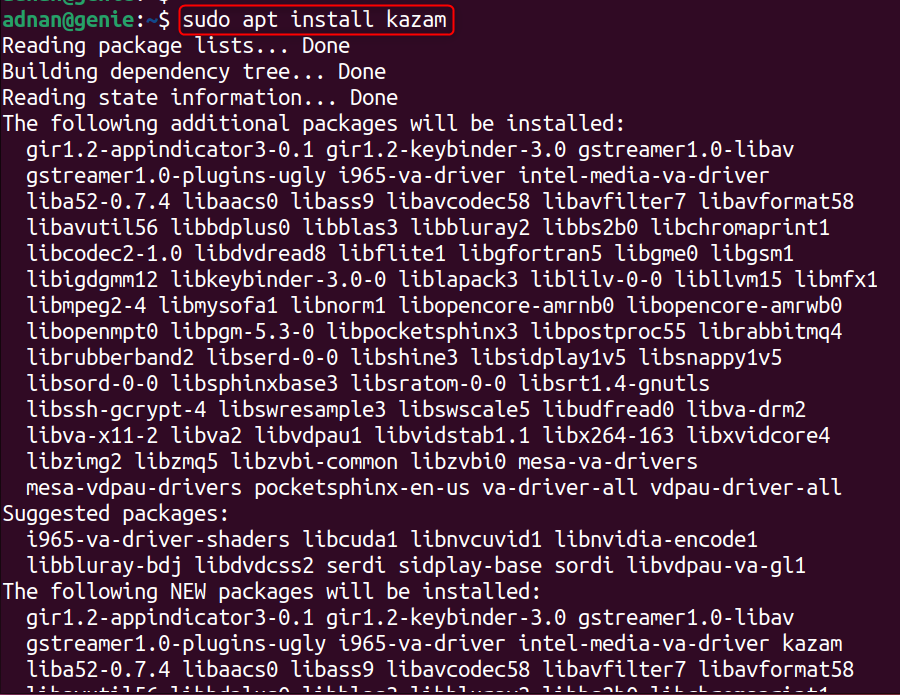
How to Take a Screenshot Using Kazam on Ubuntu?
Open/launch the Kazam app from the applications menu. Once opened, do the following actions to capture a screenshot:
- Click on the Screenshot feature to activate it.
- Then choose the specific feature, i.e., Fullscreen, Window, Area
- Finally, Click on Capture. You can change the waiting time (it is 5 seconds by default) of the screenshot, as well.
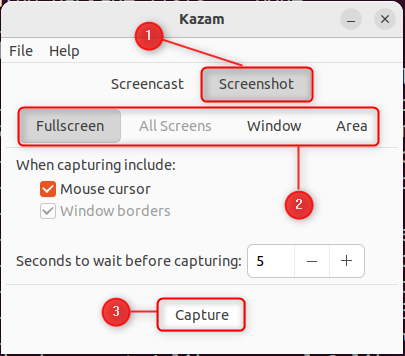
That’s how you can take the screenshot using the Kazam.
If you want to remove Kazam, you can do it using the command:
$ sudo apt autoremove kazam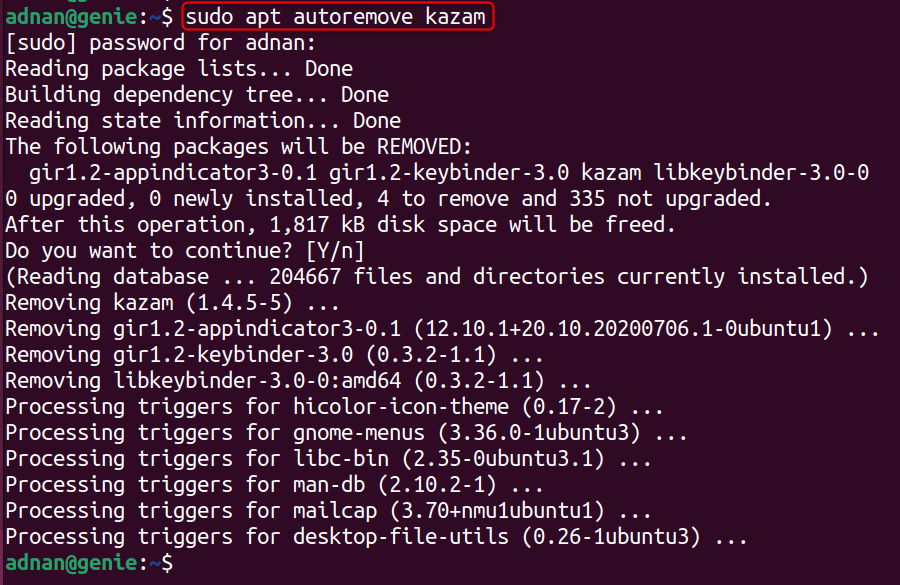
How Do I Take a Screenshot in the Ubuntu Terminal?
The terminal support for screenshots is available on Ubuntu through the GNOME-screenshot tool. Each feature of the GNOME screenshot tool can be activated from the terminal. Let’s see the commands that refer to various functionalities of the GNOME screenshot tool:
To capture the entire screen instantly:
$ gnome-screenshot
To capture the current window:
$ gnome-screenshot w
To capture the specific part of the screen:
$ gnome-screenshot -a
As discussed above, all the screenshots captured using the GNOME Screenshot will be saved in the “/HOME/PICTURES” directory.
Where are the Screenshots Saved in Ubuntu 22.04?
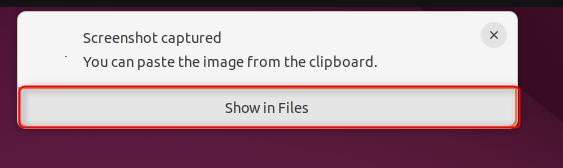
If you use the default Ubuntu screenshot tool, the screenshots are saved in the directory “/HOME/PICTURES/SCREENSHOTS.” Moreover, when a screenshot is captured, it is instantly copied to the clipboard for quick copy/paste purposes.
If you want to open the directory where the screenshot is saved, you can hover over the prompt and click on the Show in Files option as highlighted below:
Note: If other than default screenshot tools are being used, the screenshots will be saved in the directory “/HOME/PICTURES”.
Quick Tour | Shortcut Keys to Take a Screenshot in Ubuntu 22.04
Let’s summarize today’s post. Here is the table that demonstrates the function and the associated shortcut keys. These shortcut keys are applicable only for the default screenshot utility:
| Applicable When the Tool is not Running | |
| Function | Shortcut Key |
| Take a Screenshot of the specific part on the window | “PRT SCR” or “FN + PRT SCR” |
| Take a Screenshot of the Current/Selected Window | “ALT + PRT SCR” or “FN + ALT + PRT SCR” |
| Take a Screenshot of the Whole Screen | “SHIFT + PRT SCR” or “FN + SHIFT + PRT SCR” |
There is another set of shortcuts that is applicable when the screenshot tool is running. When you launch the tool, you can perform various operations through the keyboard keys as follows:
| Applicable Only When the Default Screenshot Tool is Running | |
| Functions | Shortcut |
| Select the Specific Part | s |
| Select the Entire Screen | c |
| Select Any Window | w |
| Take the Screenshot | Enter |
Bonus Tip: How to Make a Screencast in Ubuntu 22.04?
Want to learn how to record a video on your Ubuntu system? Well, this feature is also supported by the default utility of Ubuntu. Here’s how it works:
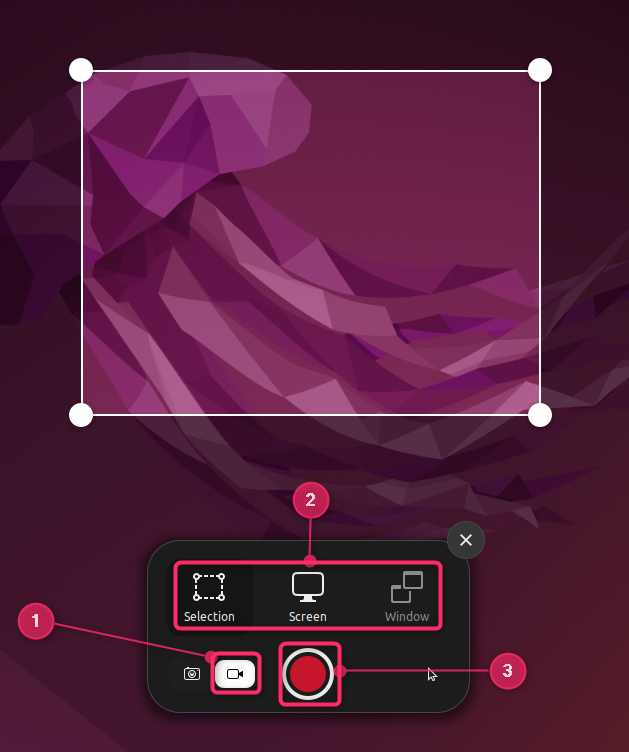
- Step 1: Open the screenshot utility and activate the video recording option.
- Step 2: Now, choose the type of video, i.e., Selection, Screen, or Window.
- Selection: If you want to capture a specific part of the screen in the video, then choose this option.
- Screen: This feature starts capturing the whole screen of the currently opened window.
- Window: If there are multiple windows opened, then you can choose between the windows to capture.
- Step 3: Finally, click on the red circular button to start capturing the video.
When the above process is completed, the part of the screen being captured will be highlighted, and the recording time will be displayed in the top right corner, as shown below:
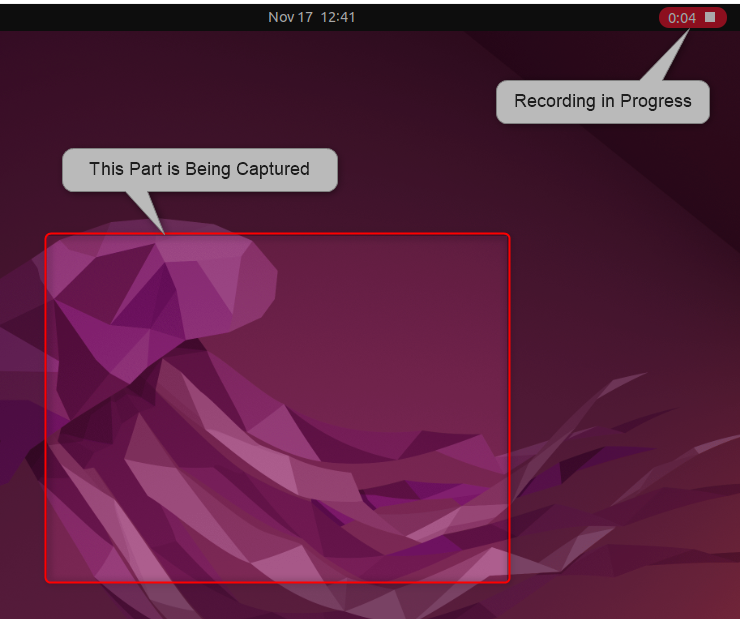
Click on the stop button to terminate and save the recording:

The default directory where the screencasts are saved is: “/HOME/VIDEOS/SCREENCATS.”
Bottom Line
Ubuntu has a built-in utility to take a screenshot of the whole screen, window, or a specific part of the screen. The easiest way to take screenshots is to utilize the shortcut keys. To capture the screenshot of the current window, use “ALT + PRT SCR” or “FN + ALT + PRT SCR”. Similarly, use the key “PRT SCR” or “FN + PRT SCR” to take a screenshot of the specific selection on the screen.
This post has listed the steps to take a screenshot on Ubuntu using the default utility and three other tools. Among the explained methods, it is recommended to utilize the default utility to take/save the screenshot in Ubuntu.
