
How to Update My Ubuntu Kernel to the Latest One
The kernel is the core component of any machine where the hardware interacts with the OS. Not only in Linux, Kernel is foreseen in mobile devices, computing devices, or any other device where the hardware has to interact with the OS.
The Ubuntu/Linux kernel sends or receives signals from hardware to the OS. Thus, a Kernel manages the processes, memory, and hardware (I/O devices, WIFI/Bluetooth components, graphics card, etc). It is the Kernel determines that how much CPU to be allocated to any process.
What if you have an outdated kernel? It sure will lack the overall management of the system. Keeping your Kernel up to date allows the hardware to interact effectively with OS and perform better.
This post will enlist the possible approaches to update the Ubuntu Kernel to the latest one.
- Importance of Linux Kernel
- Kernel Releases | Release Cycle
- How to Update the Ubuntu Kernel to the Latest One?
- How to Remove/Uninstall the Kernel From Ubuntu 22.04?
- Bottom Line
Importance of Linux Kernel
Do you know why most people prefer Linux Kernel for servers?
Linux Kernel belongs to the Monolithic family of Kernels. A Monolithic kernel shares the same space as user services which makes it run as a single program. This eventually increases the size of the OS and the Kernel itself. The increase in the Kernel size makes the execution much faster.
Contrary to that, the Microkernel family utilizes different user and kernel working spaces. This eventually makes the system (Kernel as well as OS) size smaller but results in a slow execution process.
Kernel Releases | Release Cycle
The Linux Kernel has a specific release cycle and it comprises various releases. Let’s get into these releases before we learn how to update Kernel:
- Prepatch/Release Candidate (RC): The RC kernel is the prerelease of the mainline kernel that includes the new features.
- Mainline: Also known as “Vanilla” Kernel released by the Linux Torvalds himself. Mainline Kernel consists of the latest advancements and the
- Stable: The mainline once released is considered as Stable.
- Long-Term Support (LTS): The last stable release each year is referred to as LTS. It is then supported for at least 2+ more years.
- Super Long-Term Support (SLTS): The LTS designated as the SLTS is supported for 10+ more years.
How to Update the Ubuntu Kernel to the Latest One?
Ubuntu offers multiple ways to update the kernel to the latest one, i.e., default repositories, PPA, or through .deb files. All these methods are explained in detail here:
Using the Default Repositories | dist-upgrade and do-release-upgrade
The “apt” supports two ways to update the kernel, i.e., “dist-upgrade” and the “do-release-upgrade”. The “dist-upgrade” command handles the package update while keeping the same Ubuntu version. However, the “do-release-upgrade” reads the instructions in the configuration file and upgrades your Ubuntu to the latest available release.
Let’s see how these tools are effective in updating the Ubuntu Kernel:
Using the dist-upgrade Utility
First, check the Kernel version:
uname -r

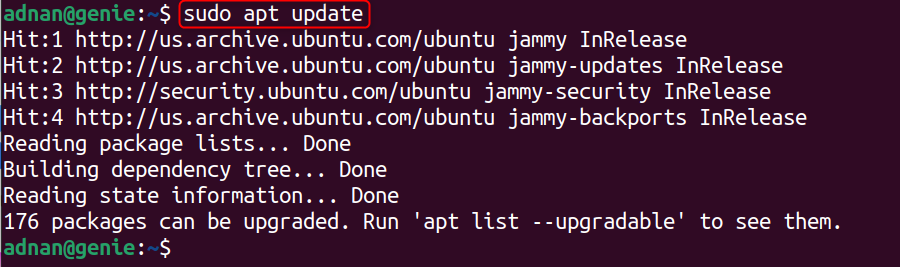
Now, update the packages list to load the latest available versions of the package in the apt list:
sudo apt update
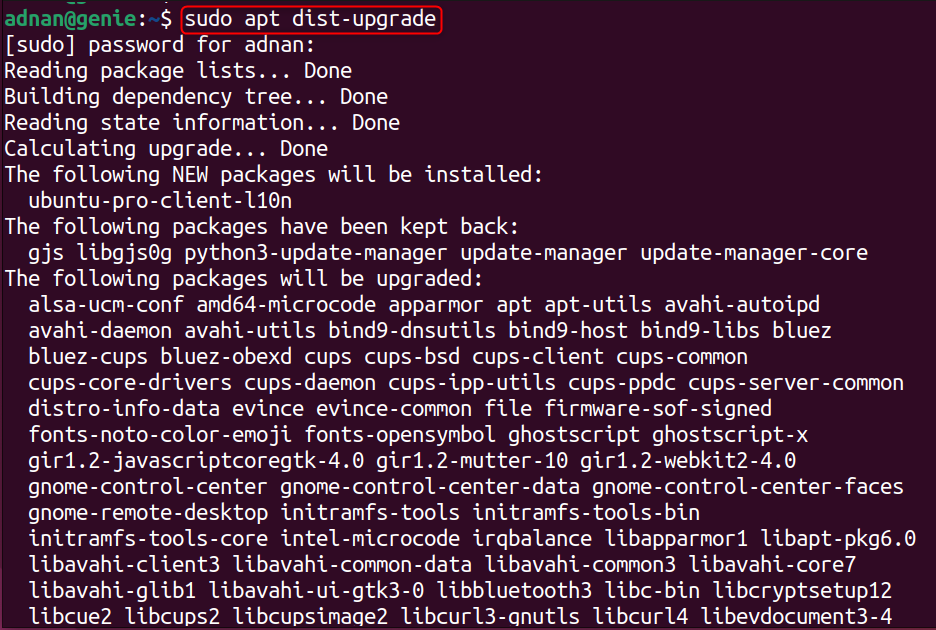
Let’s upgrade the Kernel:
sudo apt dist-upgrade
Check the Kernel version again after the reboot:
uname -r

The kernel version is upgraded to the latest available.
What if you do not get any Kernel updates through the above method?
If you are unable to update your Kernel through the above method, then there is a possibility that the latest released Kernel has not been tested for your Ubuntu release. In such a case, you need to upgrade your Ubuntu release version through the “update-manager”.
The “update-manager” is the core utility to upgrade the Ubuntu release. It has both CLI and GUI support available. Let’s discuss CLI and GUI methods explicitly:
Using the Update-Manager | CLI Support
The “update-manager-core” package handles the operations of the “update-manager” core. Inside the “update-manager-core”, there is a command “do-release-upgrade” that upgrades the Ubuntu release. Let’s learn how:
Check the Kernel Version:
uname -r

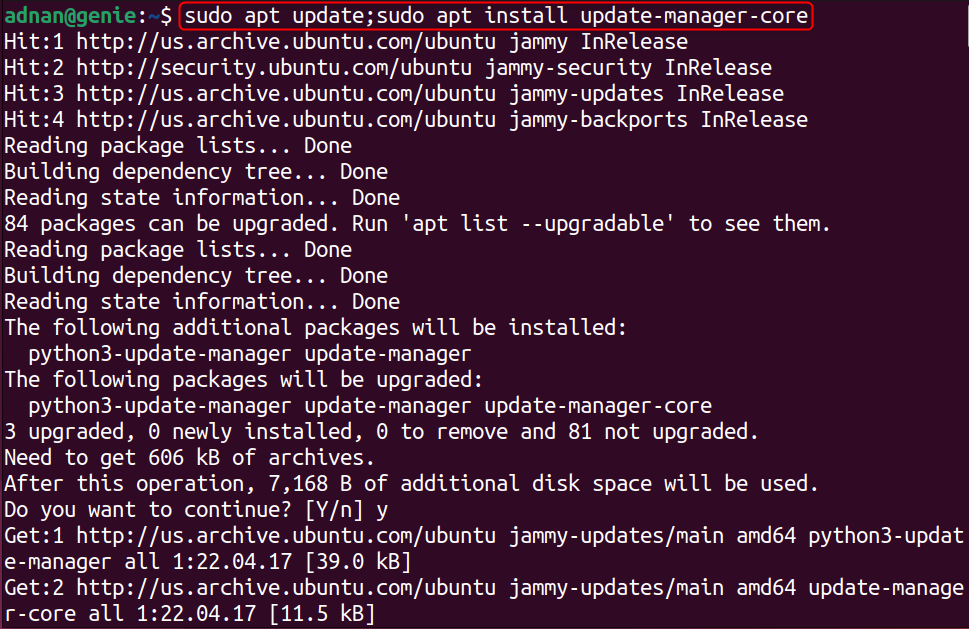
Install the Update Manager Core:
sudo apt update;sudo apt install update-manager-core
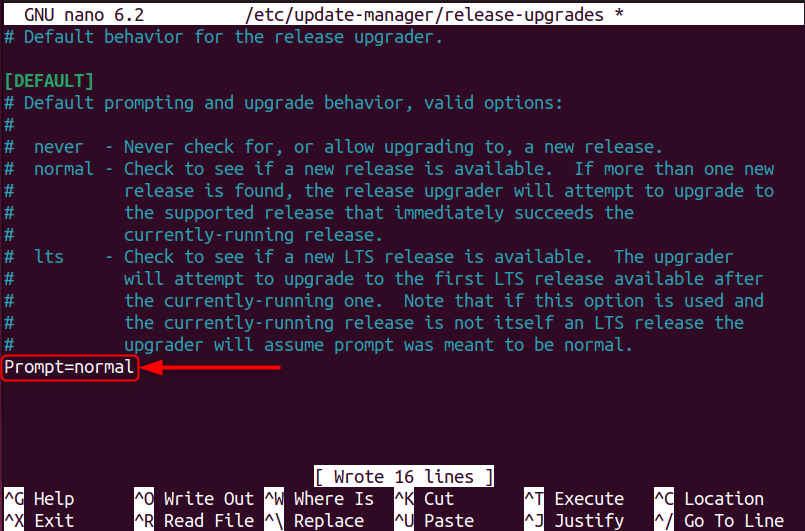
The update-manager-core package reads the instructions from the “release-upgrades” file. You need to set the “Prompt=normal” in the file “/etc/update-manager/release-upgrades”:
sudo nano /etc/update-manager/release-upgrades
Note: Before upgrading to the newer Ubuntu release, you must upgrade the packages. Do it using “sudo apt upgrade”.
Now, update the Ubuntu release which will upgrade the Kernel (after upgrading your Ubuntu to the newer release):
sudo do-release-upgrade
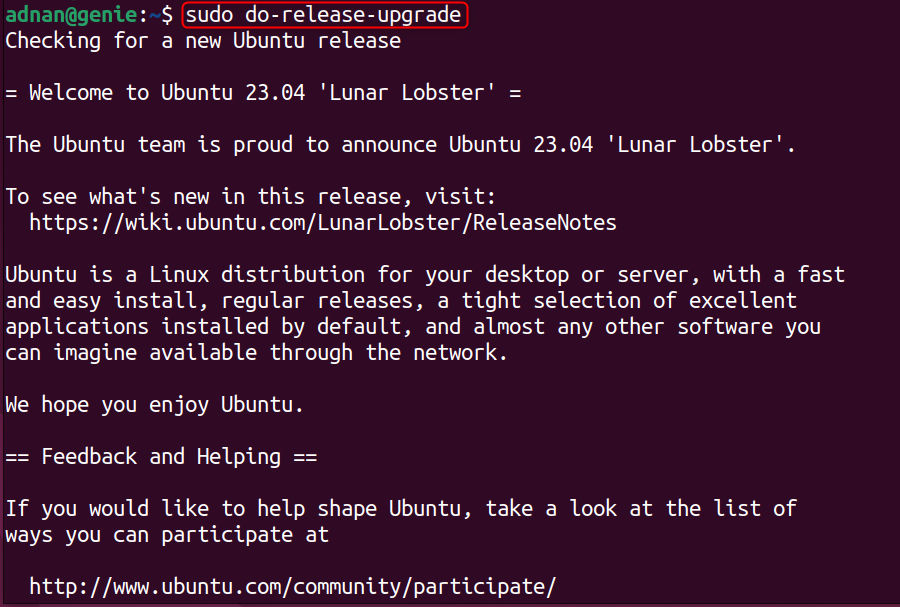
Follow the onscreen instructions to complete the process, i.e., you need to press Y or N for various prompts. Now, check the updated Kernel version:
uname -r

Important: Reboot your system and then open the “update-manager”. You will get the prompt “ upgrade to Ubuntu 23.10”. Upgrade it to “Ubuntu 23.10” to get the latest release of Kernel.

Using the Update Manager | GUI Support
The “update-manager” application needs to be exercised to update the Kernel through GUI. Open the Software & Updates (the settings of the update-manager) application on Ubuntu.

Now, launch the update-manager and you will get the prompt to upgrade your Ubuntu to the next rolling release, i.e., 23.04 for 22.04:
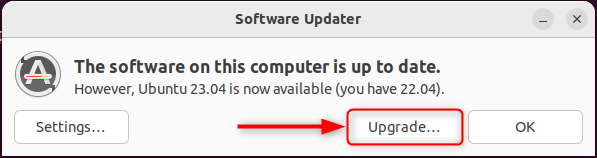
Follow the onscreen instructions to start installing the updates. The updated Ubuntu kernel will be loaded into your system.
Using the “.deb” Files
The “.deb” packages of Mainline Kernel are available from the official sources, i.e., kernel.ubuntu.com. You can download the set of Kernel files (Linux-headers, Linux-image, Linux-modules) and install them to update your Kernel.
First, check the current Kernel version (before update):
uname -r

Navigate to kernel.ubuntu.com and download the latest kernel files. At the moment, 6.6.8 is the latest mainline version available:
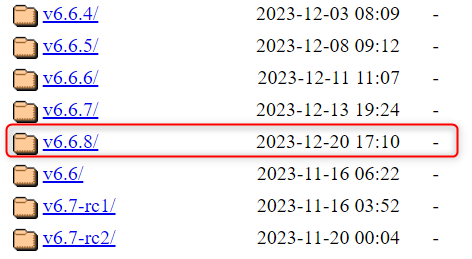
You need to download these three files: Click on them one by one to get these files:

Or you can use the following commands to download these files:
wget https://kernel.ubuntu.com/mainline/v6.6.8/amd64/linux-headers-6.6.8-060608-generic_6.6.8-060608.202312201634_amd64.deb

wget https://kernel.ubuntu.com/mainline/v6.6.8/amd64/linux-headers-6.6.8-060608_6.6.8-060608.202312201634_all.deb

wget https://kernel.ubuntu.com/mainline/v6.1/amd64/linux-image-unsigned-6.1.0-060100-generic_6.1.0-060100.202303090726_amd64.deb

wget https://kernel.ubuntu.com/mainline/v6.6.8/amd64/linux-modules-6.6.8-060608-generic_6.6.8-060608.202312201634_amd64.deb
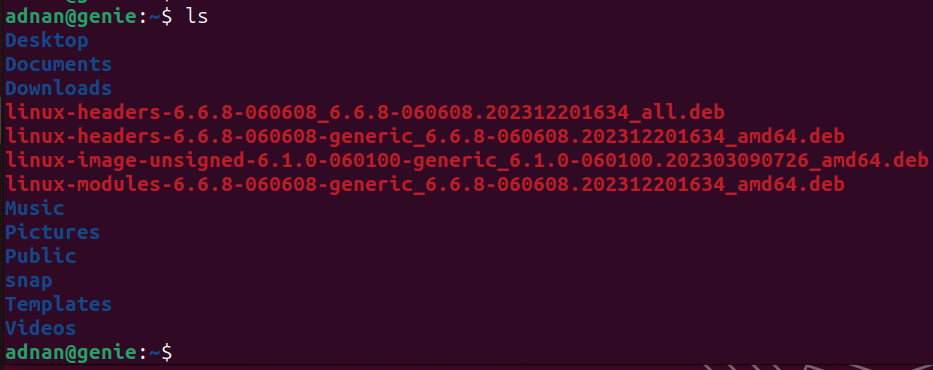
Navigate to the directory where these files are downloaded:
Now, use the below command to install this Kernel version:
sudo apt install ./linux-headers-6.6.8*.deb
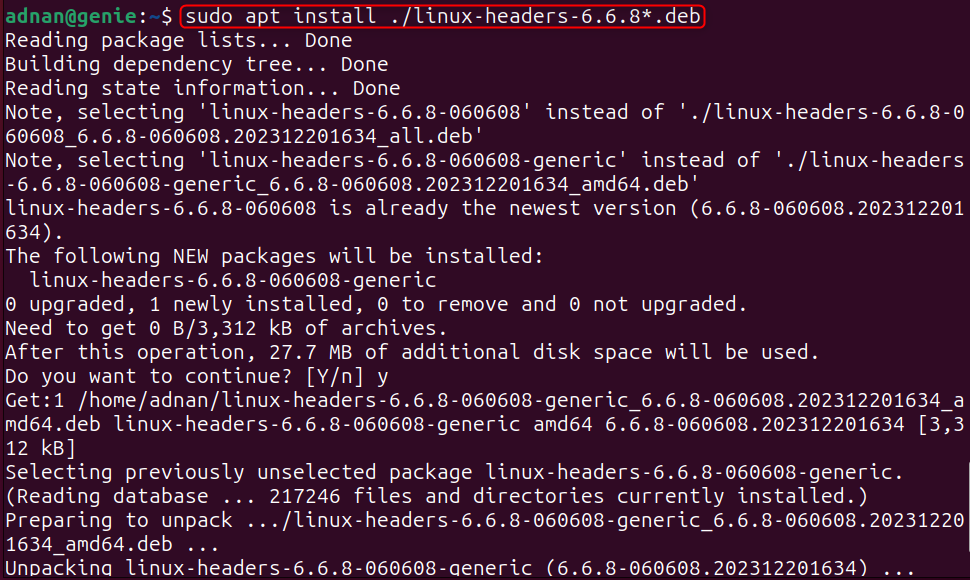
Note: You can also use the “dpkg -i” command instead of “apt install”.
Once installed successfully, reboot your system to check the newly installed Kernel version. If the version is not updated, you can switch/change it from the GRUB menu and then reboot the system.
Using the Shell Script
An automated shell script is available on the GitHub source, which allows you to update your Ubuntu Kernel to the latest one. The script-based method is quick and effective to get the updated Mainline kernel automatically. Here’s how:
Check the Kernel version:
uname -r

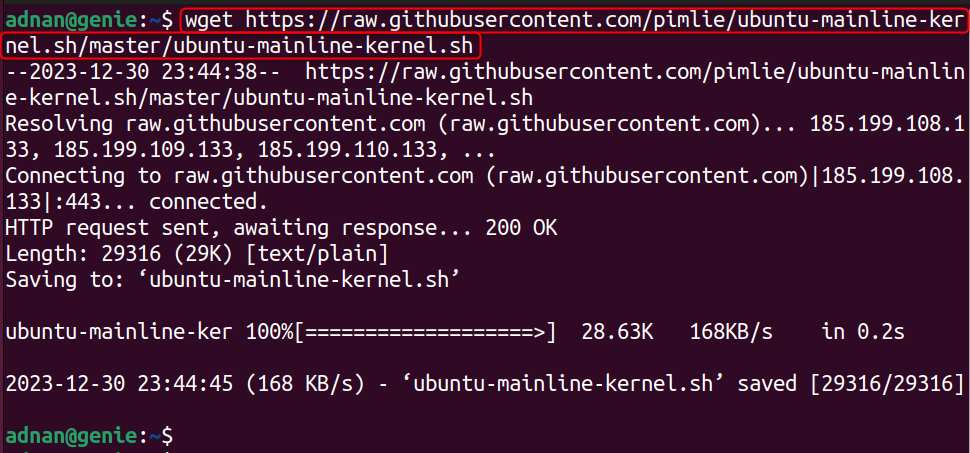
Download the shell script from the GitHub source using the command:
wget https://raw.githubusercontent.com/pimlie/ubuntu-mainline-kernel.sh/master/ubuntu-mainline-kernel.sh
Install the mainline kernel through the script and place it in the directory /usr/local/bin (to run the script anywhere else inside the system):
sudo install ubuntu-mainline-kernel.sh /usr/local/bin/
Use the below command to check/load the latest version, if available:
sudo ubuntu-mainline-kernel.sh -c

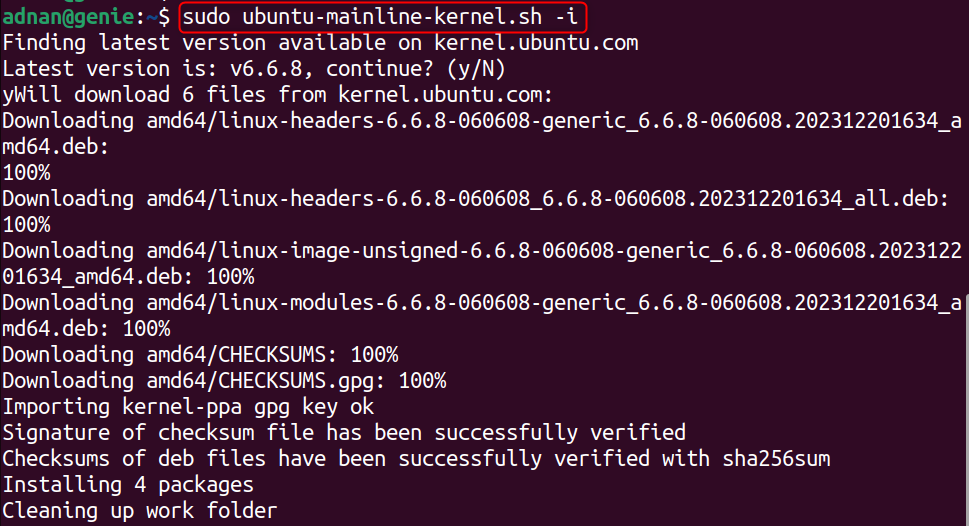
Now, run the same command but with the “-i” flag to install the loaded Kernel version:
2sudo ubuntu-mainline-kernel.sh -i
Once the installation is done, reboot the system and check the Kernel version:

Using the Mainline Kernels Application | GUI
The Mainline Kernels GUI application support is provided through the PPA “cappelikan”. Mainline application allows you to install/uninstall different Kernel versions with one click. Let’s see how:
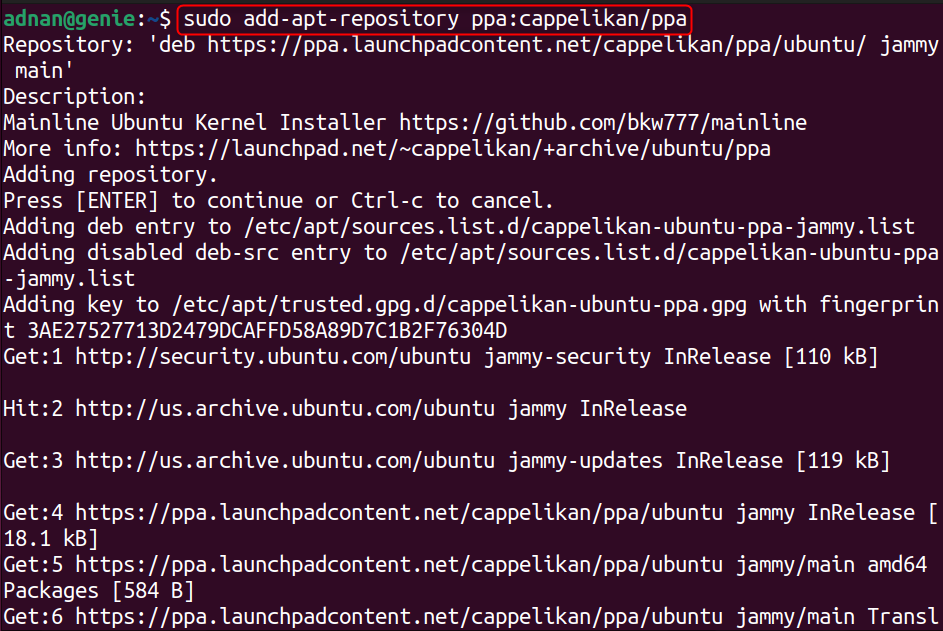
Add the Cappelikan (The source of the Mainline GUI application):
sudo add-apt-repository ppa:cappelikan/ppa
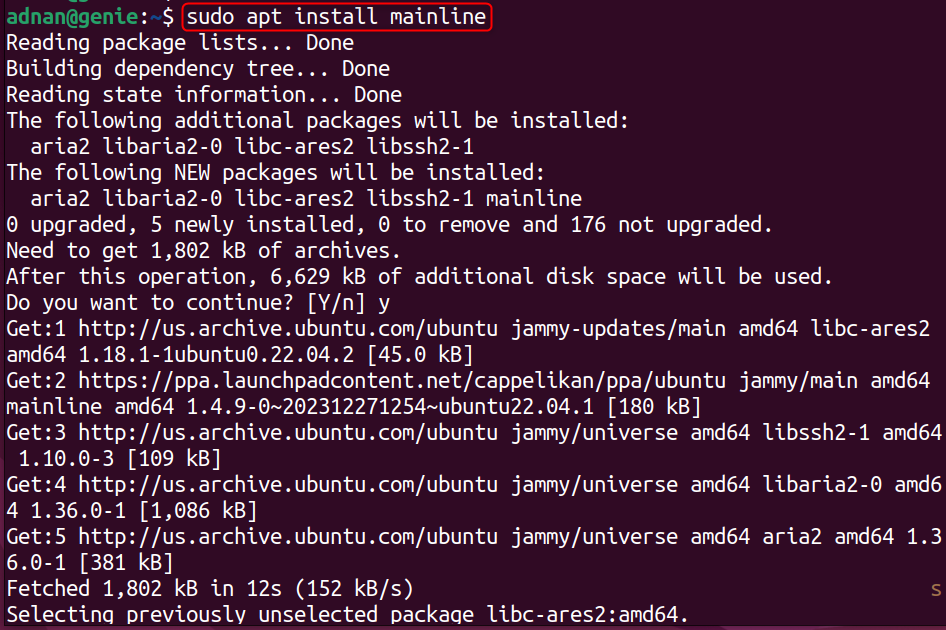
Install the application:
sudo apt install mainline
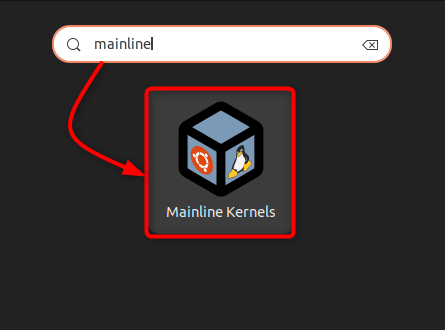
Launch the application:
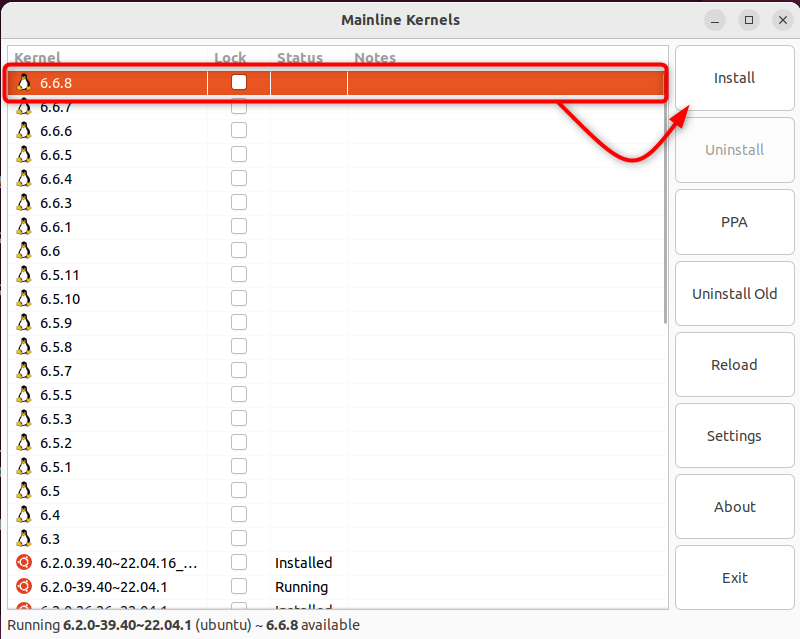
Upon its launch, the kernel list is updated and you will see the list of Kernels. Select the one you want to install and click on “Install”:
The downloading/installation will start:
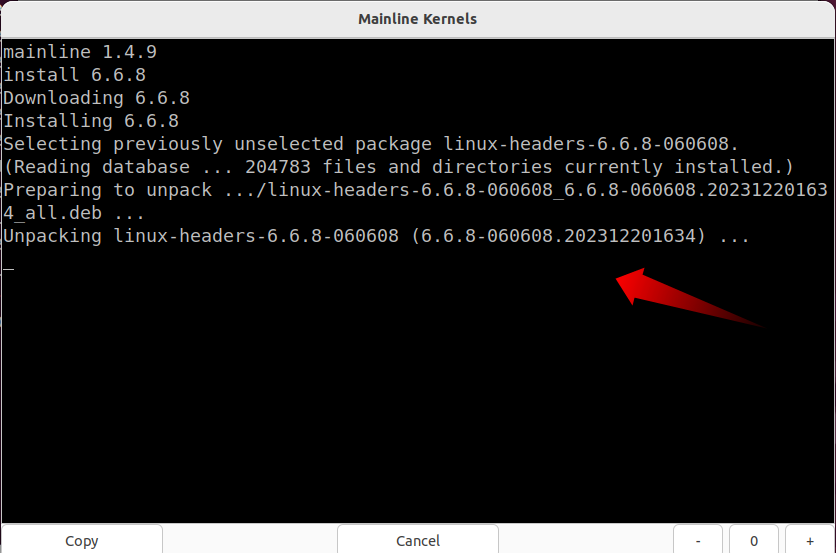
It will be installed soon.
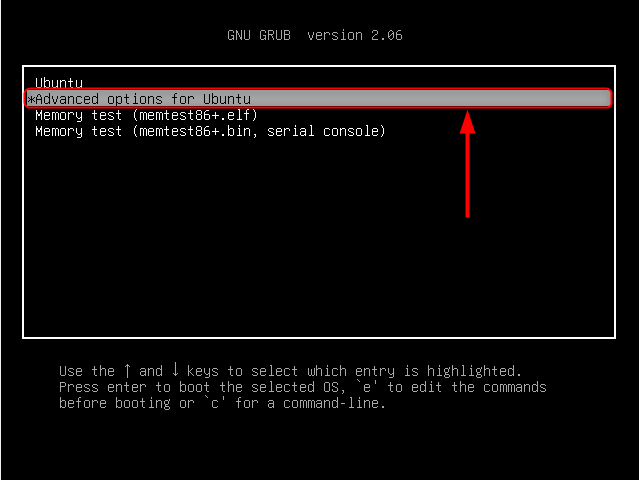
To switch to the latest installed version, reboot your machine and enter its GRUB menu. Choose “Advanced Option for Ubuntu”:
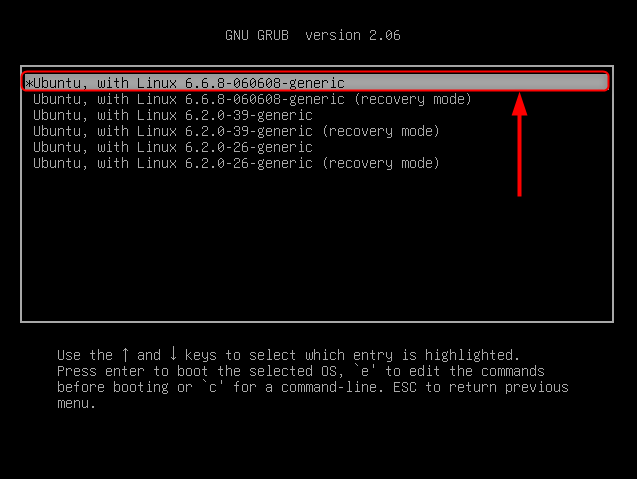
Here, select the newly installed kernel:
When the Ubuntu is booted, use the command to verify the update:
uname -r

How to Remove/Uninstall the Kernel From Ubuntu 22.04?
Over time, your Kernel updates and the system might keep the unused Kernels. It is recommended to keep on tracking and removing the unused Kernel (to vacate extra space).
There are two methods to remove the unused Kernels, i.e., Command Line (using apt) and GUI (Using Mainline Kernels). Let’s see how it is carried out:
Using CLI (Terminal) | apt
The unused kernels (either installed from the PPA or deb) can be removed using apt. Here, you have two choices, i.e., automatically remove the Unused Kernels or Manually remove them one by one. Let’s get into these methods, one by one:
- Automatically Removing Unused Kernels
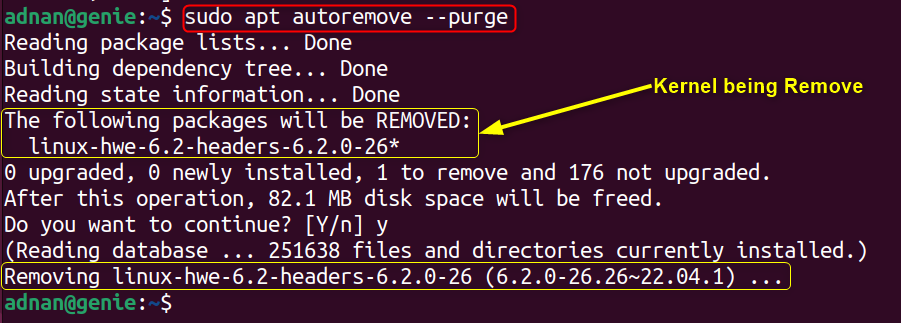
The apt’s autoremove and purge command removes all the dependencies and configurations of the unused packages. Using these both options together will remove the unused Kernels as well. Let’s see how:
sudo apt autoremove --purge
- Manually Removing Unused Kernels
While removing Kernels one by one, you must not remove the currently running and the one version older than it. Else the system malfunction occurs. Thus, be cautious while performing this method. Let’s get into it:
First, check which version your system is currently running:
uname -r

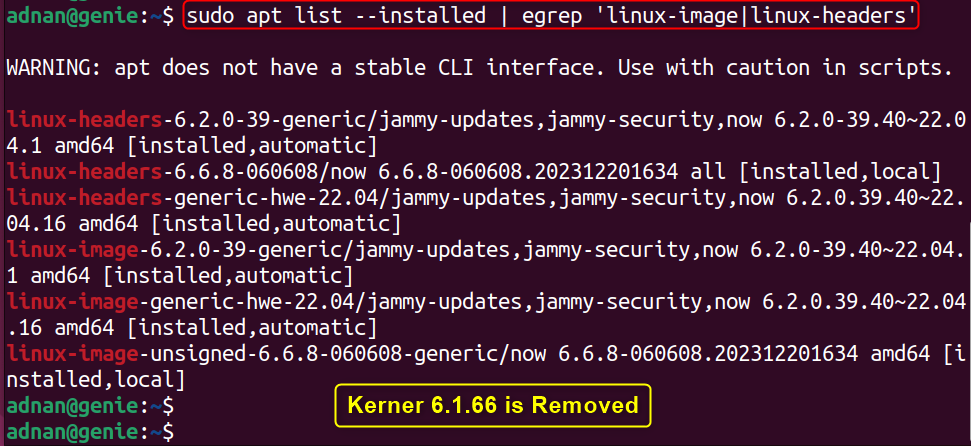
First, get all the installed Kernels (which includes the associated Kernel files):
sudo apt list --installed | egrep 'linux-image|linux-headers'
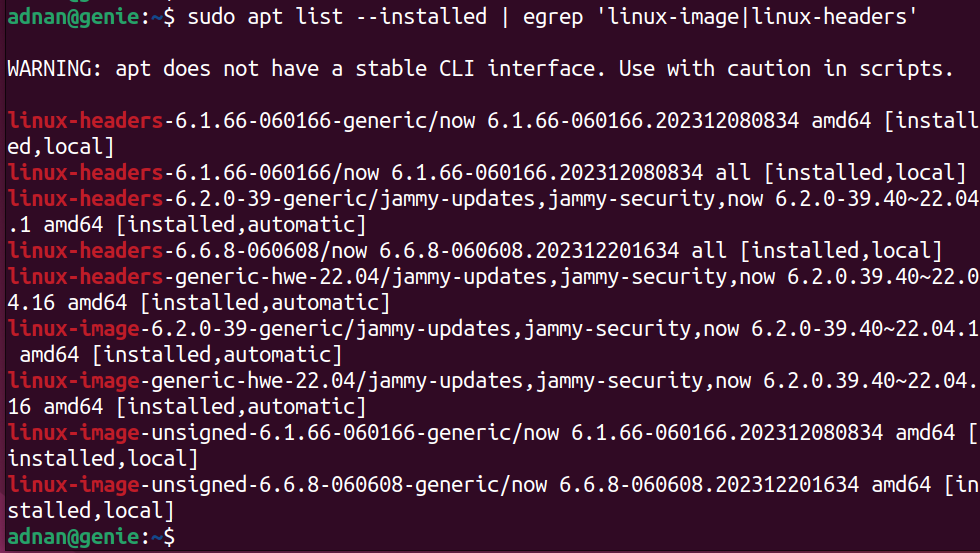
From the output, it is seen that the versions “6.6.8” (which is running actually), “6.2.0”, and “6.1.66” are installed.
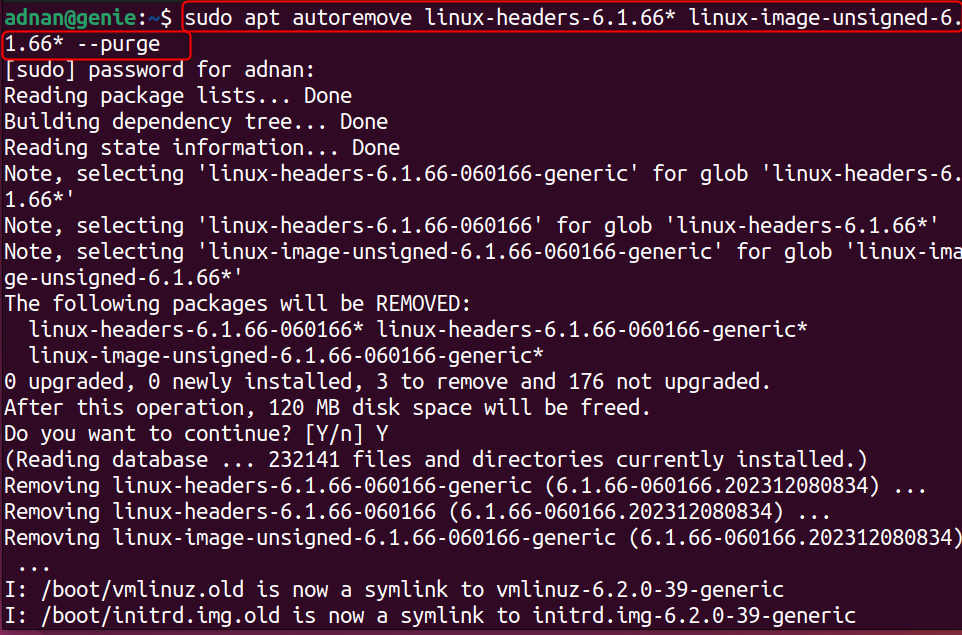
To remove the specific Kernel, use the autoremove command with the headers and image file names. For instance, the command below uninstalls/removes the 6.1.66 kernel:
sudo apt autoremove linux-headers-6.1.66* linux-image-unsigned-6.1.66* --purge
You can verify the removal again by using the command:
sudo apt list --installed | egrep 'linux-image|linux-headers'
Using GUI | Mainline Kernels Application
Mainline Kernels is the GUI application that is installed through the PPA method. It is used to manage (install and uninstall Kernel versions) the Kernel versions on Ubuntu/Debian. Let’s use it to remove unused Kernels on Ubuntu:
To uninstall the unused Kernel versions, open the Mainline Kernels application and click on the “Uninstall Old”:

And the uninstallation will begin:
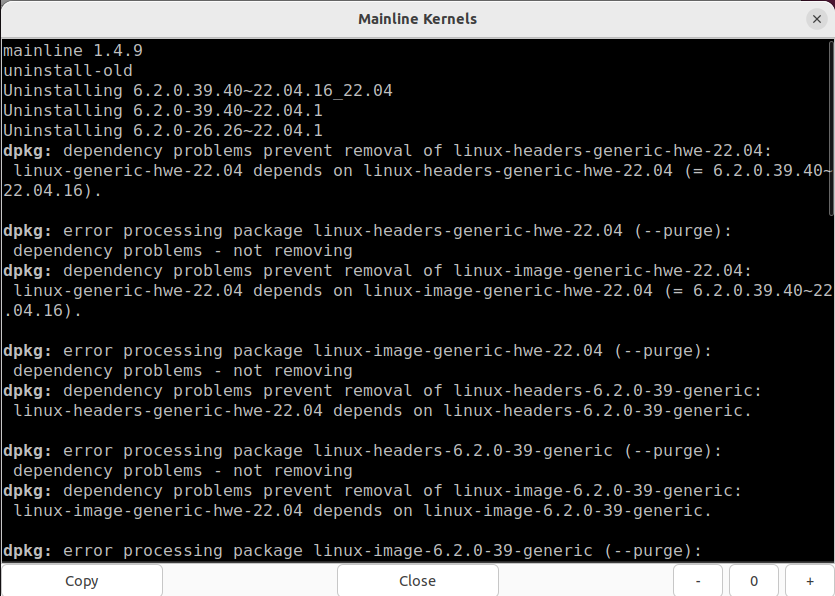
Note: The Mainline Kernels application does not remove the one version older than the version you are running. Therefore, it keeps one running and the other as a backup.
Bottom Line
It is recommended to update your Kernel from the default repositories (core libraries) of Ubuntu, i.e., dist-upgrade or do-release-upgrade tools. If you want to forcefully update the Ubuntu Kernel, upgrade your Ubuntu release or use the PPA or the debian package files.
While updating the Ubuntu Kernel, you might face various Kernel versions, Release Candidate, mainline/stable, LTS, or SLTS. The release candidate is the pre-patch (or the beta release), which is not yet forwarded to the mainline. Thus, do not update your Kernel to the Release Candidate to avoid any performance issues/system malfunctions.
This post has listed all the methods to update the Ubuntu Kernel to the latest one.
