Install Dark Table on Linux Mint 21
Dark Table is a platform for raw image editing. It is a free and open-source tool that can work well with Linux, macOS as well as with the Windows operating system. Available in 26 different languages, Dark Table presents you with a wide range of feature sets with which you can enhance your photographs to the fullest while preserving their quality. Moreover, it can work equally well with almost all the different image formats available out there. In this article, we will see how we can install Dark Table on a Linux Mint 21 system.
Installation of Dark Table on Linux Mint 21:
To install Dark Table on Linux Mint 21, you have to carry out the following steps on your system:
Step # 1: Updation:
First, you need to begin with the updation of your system that you can do simply with the help of the command shown below:
sudo apt update
![]()
This step will basically prepare your Linux Mint 21 system for further installations.
Step # 2: Dependency Resolution:
Now, you need to ensure that all the required dependencies have been resolved before installing Dark Table on your system. For that, you will have to execute the command that follows:
sudo apt install dirmngr ca-certificates software-properties-common gnupg gnupg2 apt-transport-https –y
![]()
This command will install all those packages upon which the installation of Dark Table depends i.e. you will not be able to install Dark Table on your Linux Mint 21 system without having these packages installed on it beforehand.
Step # 3: Installation:
After the dependency resolution, you can move directly to the Dark Table installation by executing the command shown below:
sudo apt install darktable –y
![]()
This command will take a few seconds to run after which Dark Table will be installed on your system.
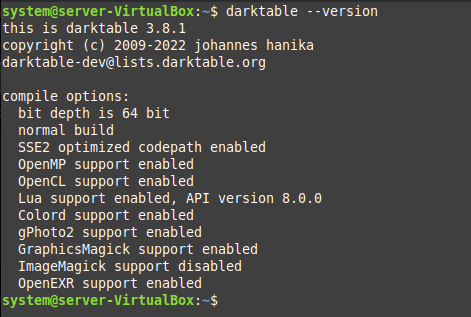
Step # 4: Version Check:
Once Dark Table has been installed successfully on your system, you can easily perform a version check by running the following command:
darktable --version
![]()
The version of Dark Table is displayed in the image shown below:
Step # 5: Launching:
Now, to launch the Dark Table dashboard from your terminal, you have to run the following command:
darktable
![]()
The Dark Table dashboard is shown in the image below:
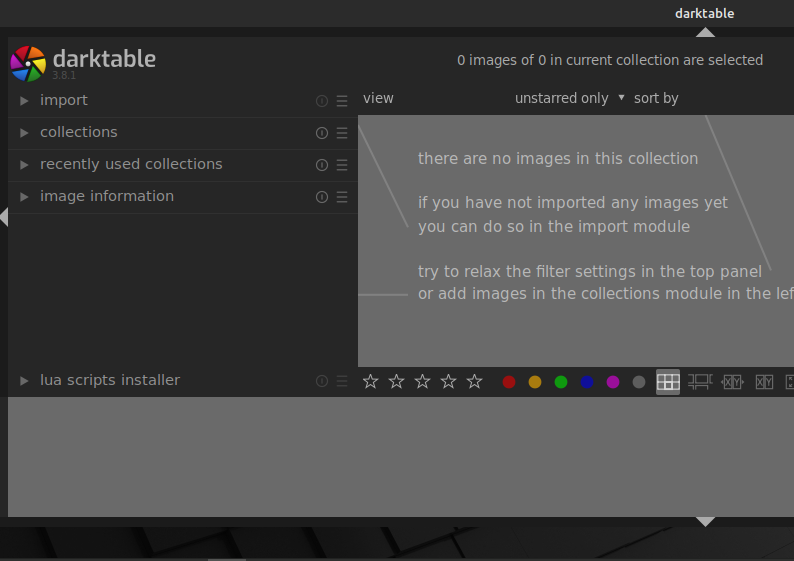
From this dashboard, you can start editing your images right away.
Removal of Dark Table from Linux Mint 21:
If you have to remove Dark Table from your Linux Mint 21 system, then you simply need to run the following command:
sudo apt-get purge --autoremove darktable
![]()
This command will not only remove Dark Table from your system but also the packages that got installed along with it.
Conclusion:
This article was mainly crafted to share with you the installation procedure of Dark Table on a Linux Mint 21 system. However, we started with a brief overview of this tool followed by the actual installation method. Along with that, we have also provided the command with which you can uninstall this tool at any time from your Linux Mint 21 system.
