
How to Use/Manage Task Manager on Linux Mint?
Linux Mint offers a user-friendly interface and several applications/programs to fulfill client needs. One of the essential tools that every Linux user must know how to use is the “Task Manager”. It allows users to monitor and manage the processes that are running on the system, such as applications, daemons, and services. Furthermore, the Task Manager kills or terminates any particular process that consumes resources or does not respond.
By considering its importance, this guide will explain the detailed usage of “Task Manager” including launching, viewing, and sorting the processes by various criteria. In addition, killing, terminating, or changing the priority of a process and customizing its settings and appearance on the Linux Mint.
- How to Use/Manage Task Manager on Linux Mint?
- How to Use/Manage Task Manager on RHEL-based Linux Distributions?
Let’s begin our journey with the basics of Task Manager.
How to Use/Manage Task Manager on Linux Mint?
The “System Monitor” application is the default graphical Task Manager on Linux-based Distributions including Debian, and Non-Debian systems. It provides an overview of your system’s performance, network, processes, resources, file systems, and many more. There are multiple ways to access and use the task manager on Linux Mint, depending on your preference:
- Launch Task Manager
- View and Sort the Processes
- End, Kill, Terminate, or Change Process Priority
- Customize the Task Manager Settings and Appearance
All the possible ways to use and manage the Task Manager on Linux Mint are given below with step-by-step instructions:
Launch Task Manager
There are different ways to launch the Task Manager on Linux Mint, based on convenience. Let’s discuss popular launching ways:
From Menu
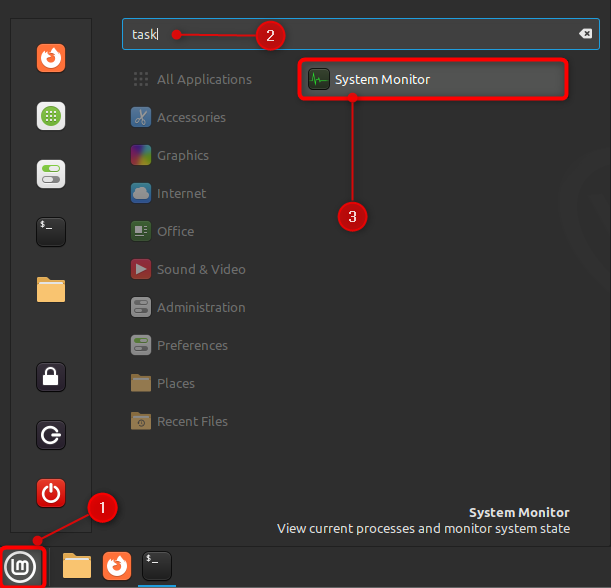
Users can access the “Task Manager” from the menu by clicking on Menu > System Monitor.
From the Terminal
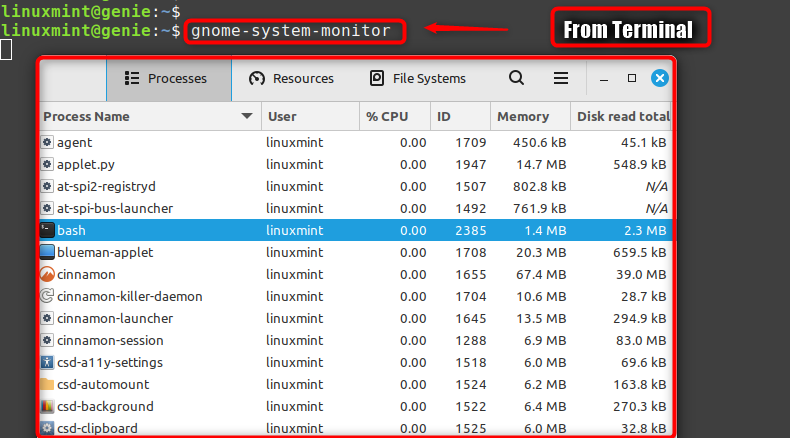
Users can also launch the “Task Manager” by typing “gnome-system-monitor” and pressing Enter.
From Keyboard Shortcut
Using a keyboard shortcut to launch the Task Manager is a quick way. For this, the access keyboard application from Menu. Then, go to the “Shortcuts” section > “Add custom shortcuts” button > and enter the “System Monitor” application with the command to launch it. Finally, add the shortcut key “Ctrl+Shift+Esc” to launch on Linux Mint:
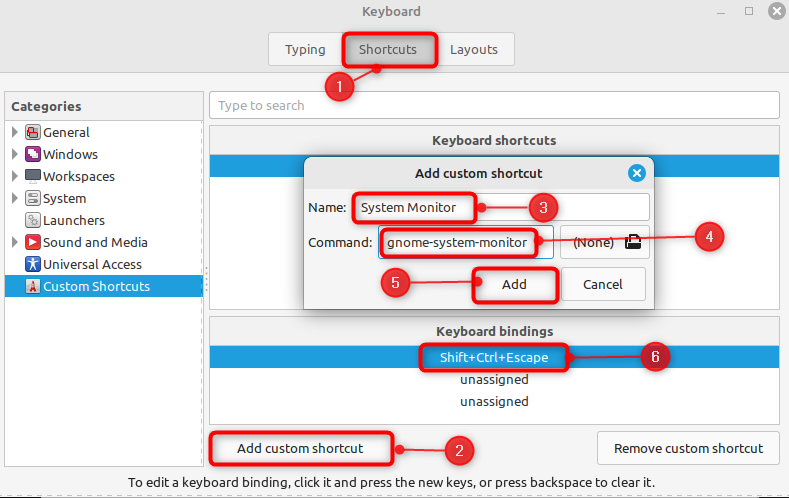
Note: Users can add shortcut keys based on their requirements.
View and Sort the Processes
Once the “System Monitor” app is open, users can visualize three sections: “Processes”, “Resources”, and “File Systems”. Each one represents different information about the system as well as its processes.
View Running Processes
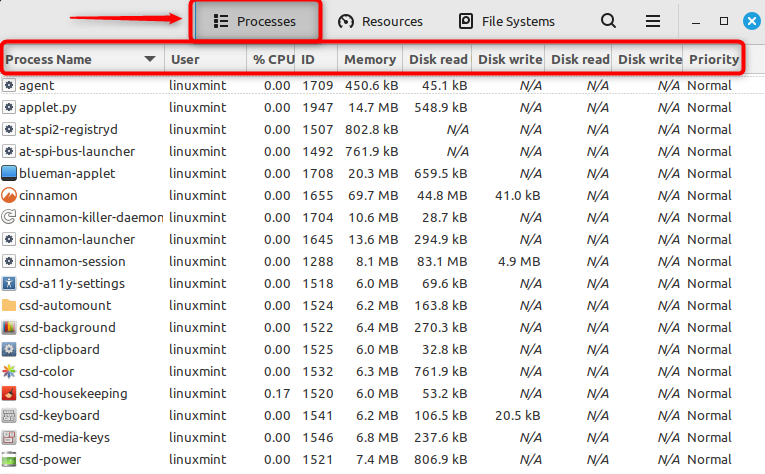
The “Processes” tab shows all the processes running on their system, along with some information such as their name, PID (process ID), user, status, CPU usage, memory usage, priority, disk read/write, and Priority:
Sort Processes
To sort the processes by any of these criteria, click on the column header. For example, if you want to see which process is using the most CPU, click on the % CPU column header as below:
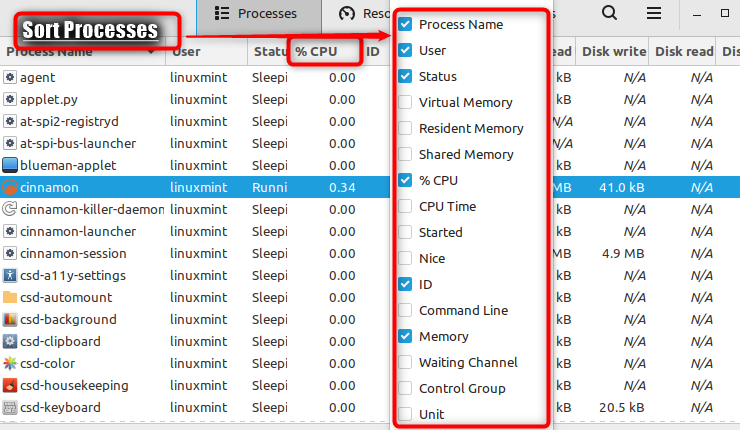
Note: Users can press any particular column header portion to sort processes by that criterion in descending or ascending order.
Search Specific Process
To search for a specific process by name or PID, use the search box at the top right corner of the window and enter the process number as “1655”:
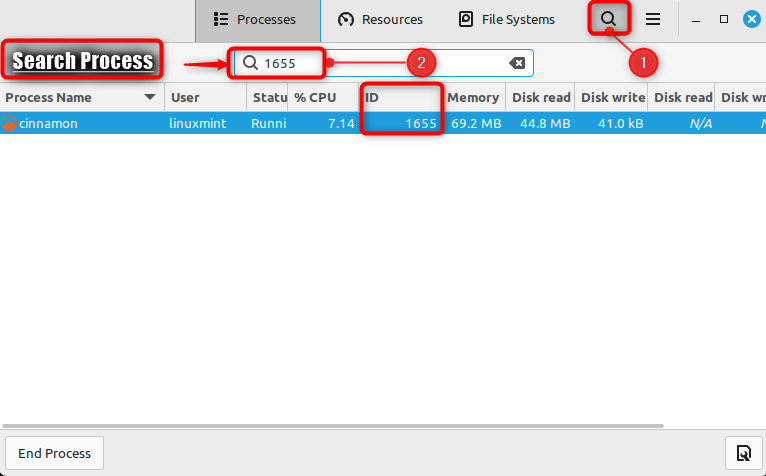
Alternatively, users can utilize it to filter the processes by name or command.
End, Kill, Terminate, or Change Process Priority
Sometimes, users may face a process that is not responding, consuming too many resources, or other issues. In such cases, users must end, kill, terminate, or change the priority of that process. Let’s explore possible cases:
End Process
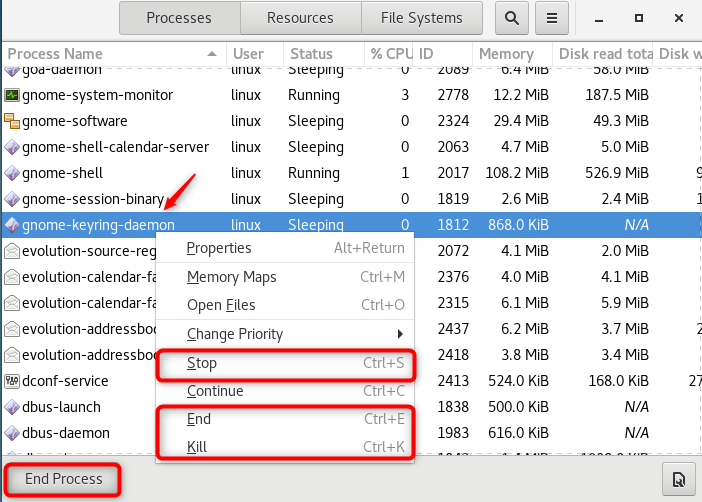
To end a specific process that is not responding or consuming too many resources, choose it and hit the “End Process” button at the left corner of the window:
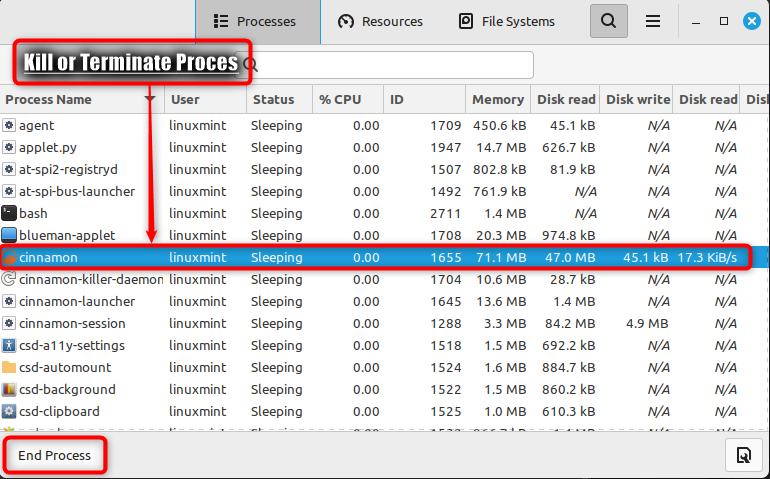
It sends a SIGTERM signal to the selected process. This process may or may not comply with this request, based on how it is planned.
Users can also right-click on the “process” and pick the “End Process” option from the context menu:
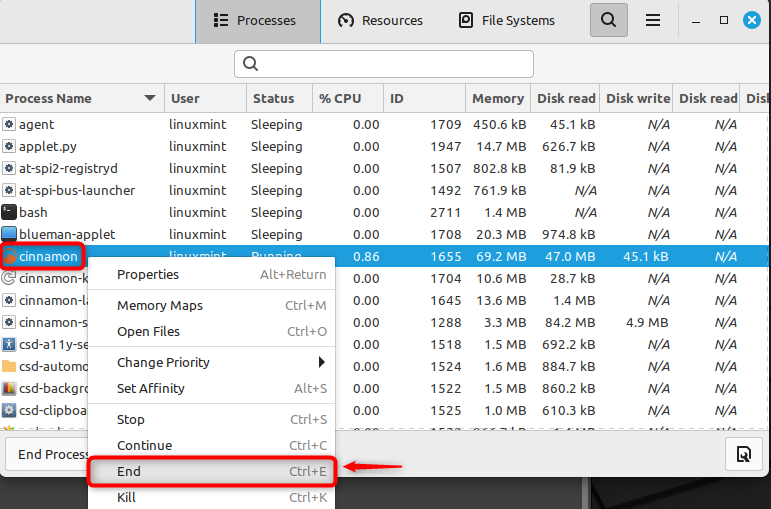
Kill Process
To kill the specific process, hit right-click on the process and choose the “Kill” option or use the “Ctrl+E” key. In our case, choose the “bash” process and kill it:
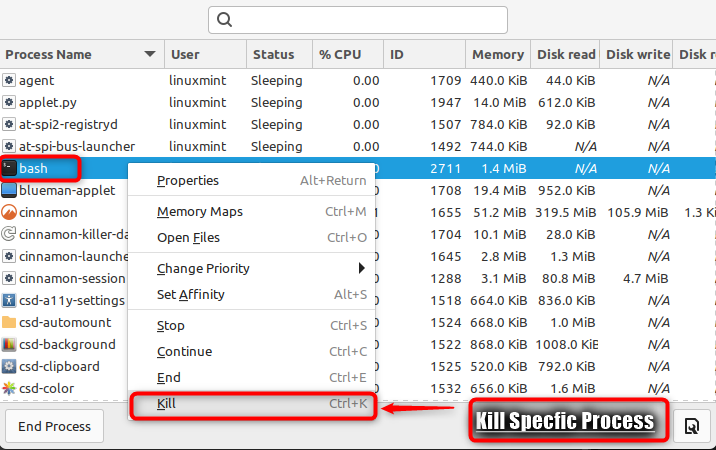
It sends a SIGKILL signal to the process, stopping it (forcefully). The process has no other choice, however, but to terminate on an urgent basis, without saving any data or performing any cleanup. This option is the best, as it may cause data loss.
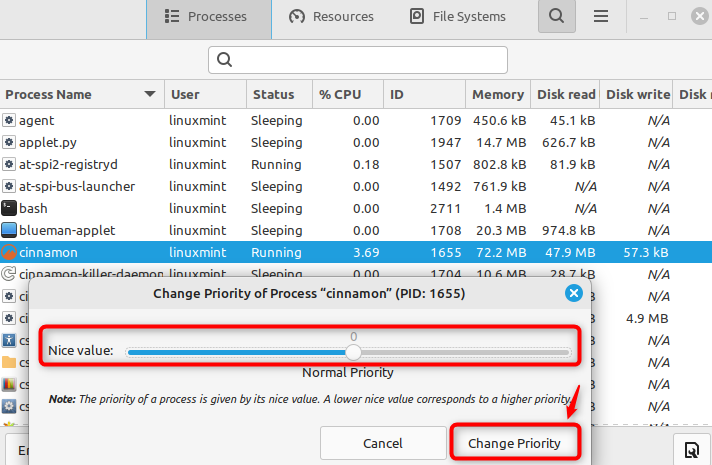
Change Priority
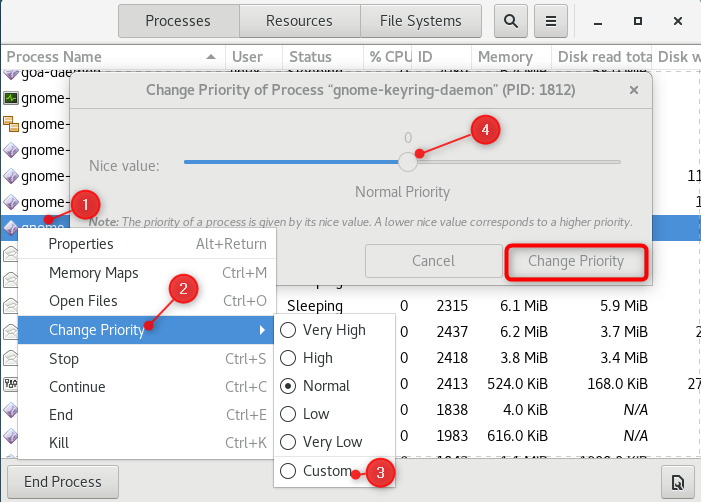
To change any particular process priority, hit right-click on it from the list and choose the “Change Priority” option from the context menu. After that, choose from five levels of priority: Very High to Very Low.

Note: From the above “Custom” option, users can increase as well as decrease the priority based on typing a number in the box or slider. It may improve or degrade the system performance to balance it.
By default, most processes have a priority of 0. It allows users to change the priority (or niceness) of the process, which is a number between -20 and 19 that indicates how much CPU time it should receive. The higher number means a lower priority, and vice versa:
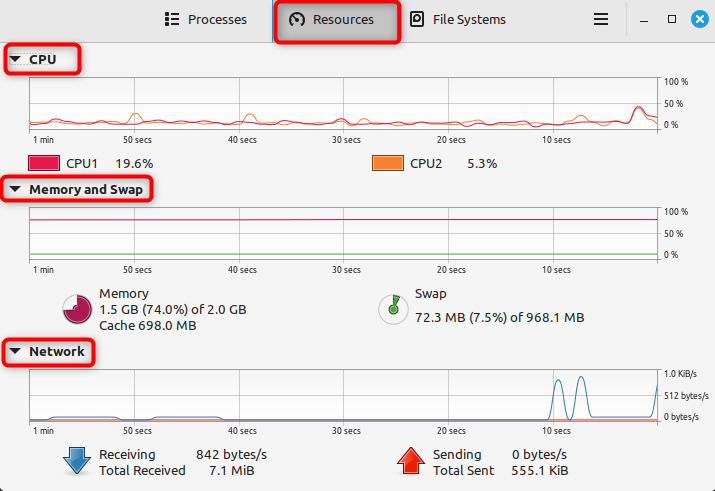
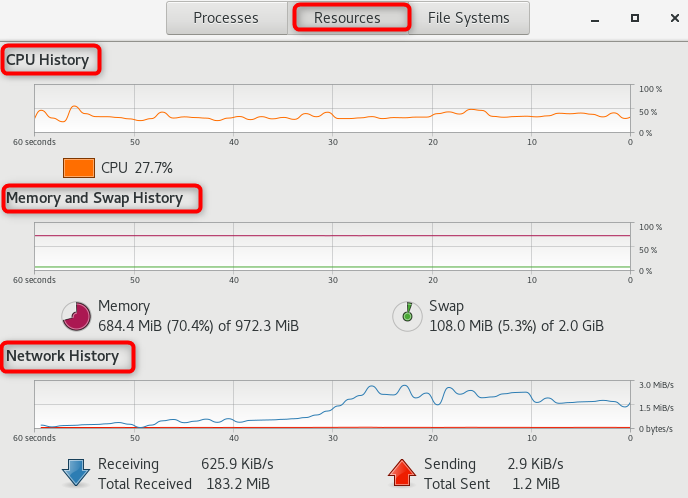
Shows the Graphs of Resources
The “Resources” tab represents the graphs (visual representation) of CPU, swap, memory, and network usage over time. Moreover, users can also zoom in or out based on the mouse wheel or the buttons at the bottom:
File Systems
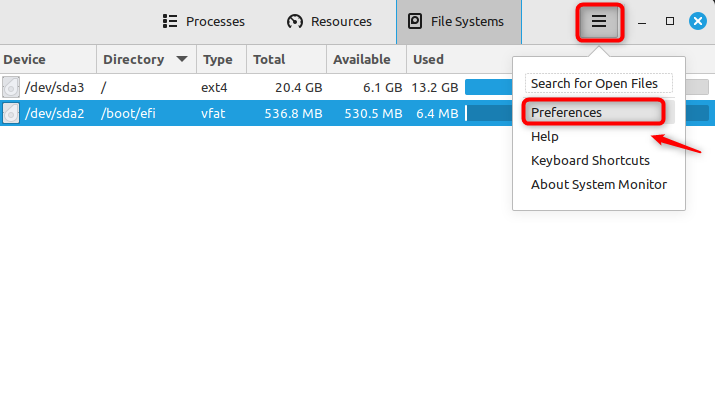
The “File Systems” section presents device information about the mounted file systems, including name, directory, type, total size, used as well as available space, and percentage usage:
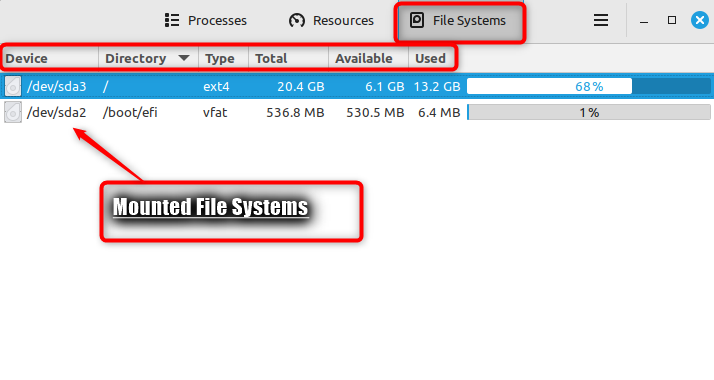
Note: Users can unmount a file system by selecting it from the list and clicking on the “Unmount Volume” button at the bottom.
Customize the Task Manager Settings and Appearance
The “Task Manager” also allows users to customize some of its settings and appearance by clicking on the Preferences option.
Customize Some Settings
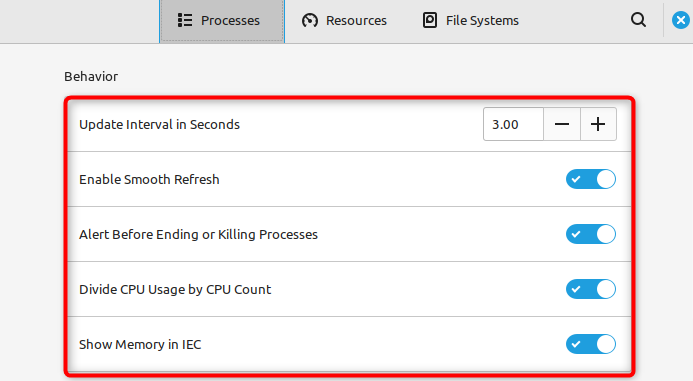
The “Preferences” option customizes some settings of “Task Manager”, columns to show in the “Processes” tab, graphs to show in the “Resources” tab, and refresh rate for updating the information:
Let’s explore some of the Task Manager options:
General
Choose whether to show all processes or only your processes, show memory usage in bytes or percentages, show CPU usage in hertz or percentages. In addition, whether to show disk read/write activity in bytes or percentages, and confirm before ending or killing a process:
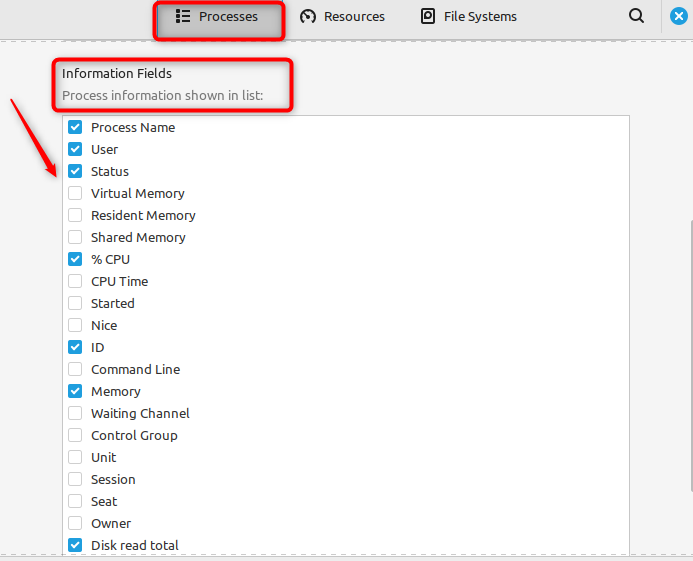
Customize Processes View
Users can choose any particular column to display in the “Processes” tab, and modify their order and width. Users can also choose whether to show icons for processes and users.
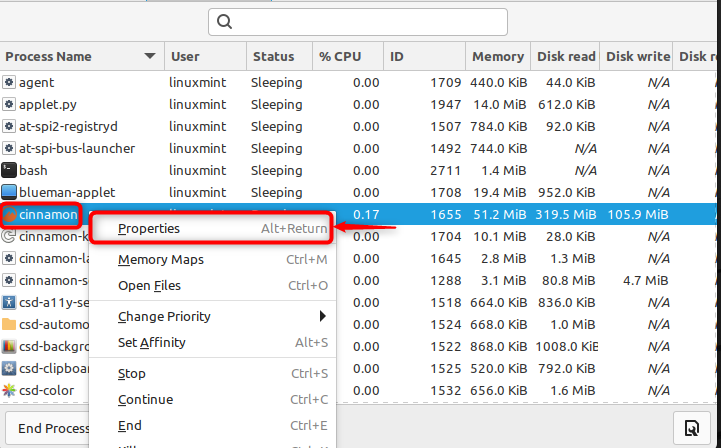
View Details About a Process
To view more details about a process, such as its command line arguments, environment variables, memory maps, open files, security context, etc., select the process from the list. After that, press the right-click on a specific process and pick the “Properties” option from the dropdown list:
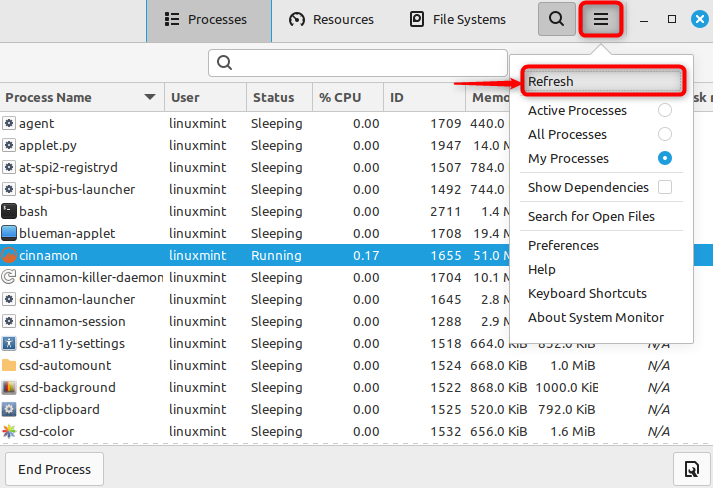
Refresh Information
To refresh the information displayed by the “System Monitor” application, press the “Refresh” option that is present at the top right corner of the interface or press F5 to refresh:
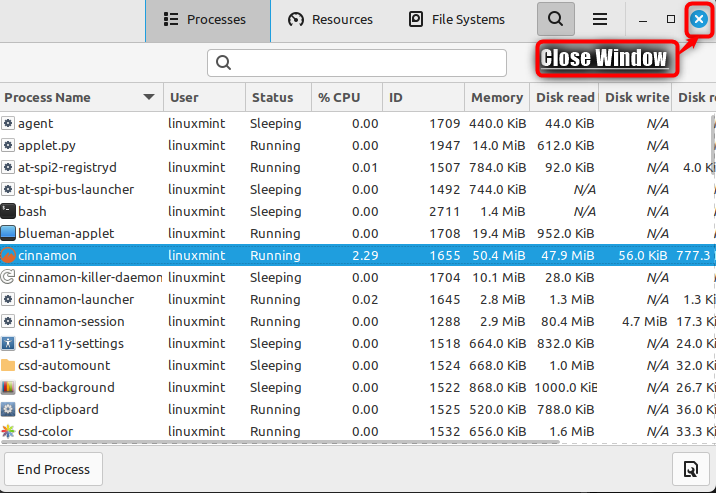
Close System Monitor Application
To close the “System Monitor” application, press the “X” button present at the top right corner of the interface. Alternatively, users can hit “Alt+F4” to close:
That is all from the guide to detailed usage of Task Manager on Linux Mint.
How to Use/Manage Task Manager on RHEL-based Linux Distributions?
Task Manager can be used to view the CPU, memory, disk, and network usage and kill, renice, or change the priority of processes.
To use Task Manager on RHEL Linux distribution (CentOS), follow these instructions:
Launch Task Manager
Open a terminal window and type the below command to launch Task Manager:
| gnome-system-monitor |
![]()
Note: Alternatively, users can search for Task Manager in the applications menu and click on it.
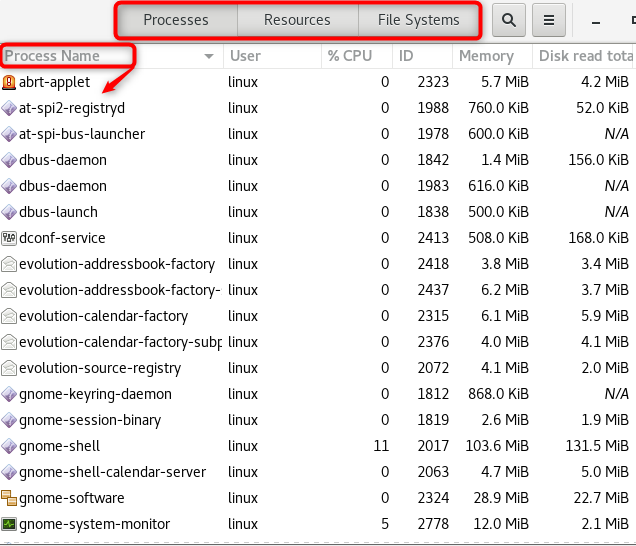
List of Running Processes
In the Task Manager interface, visualize three tabs: “Processes”, “Resources”, and “File Systems”. The “Processes” tab shows the list of all processes that are in running state on the system, along with their PID, user, status, CPU, memory, disk read/write, and priority:
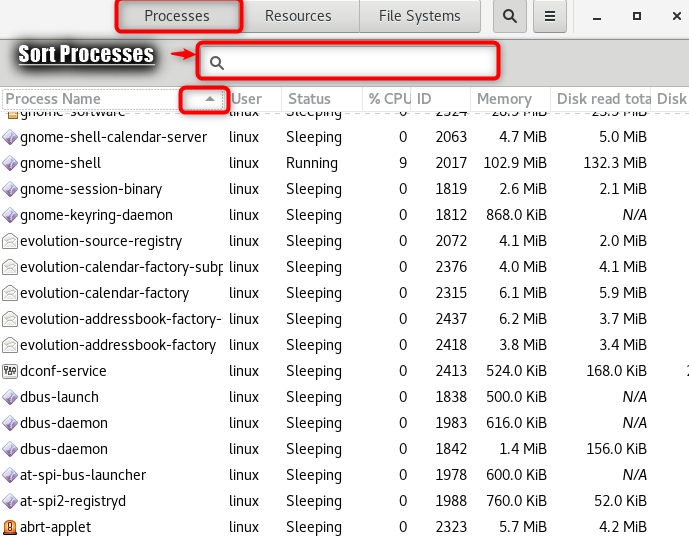
Sort Processes
You can sort the processes by clicking on the column headers, or filter them by typing in the search box:
Kill Process
To kill a specific process, select it and press the “End Process” button at the bottom of the screen. Or utilize right-click on this process and choose “End Process” from the context menu:
Change Niceness Value
To renice a process, which means to change its niceness value or how much CPU time it gets, select it from the list and click on the “Change Priority” button by following the below figure:
Note: Users may be asked to enter a new niceness value between 19 (lowest priority) and -20 (highest priority).
Shows the Graphs of Resources
The “Resources” tab represents the graphs (visual representation) of CPU, swap, memory, and network usage over time. Moreover, users can also zoom in or out based on the mouse wheel or the buttons at the bottom:
File Systems
The “File Systems” section presents device information about the mounted file systems, including name, directory, type, total size, used as well as available space, and percentage usage:

That is from the CentOS based Linux distribution.
Conclusion
Task Manager is a worthy tool for managing as well as monitoring all processes that are currently running on the Linux Mint. To use/manage Task Manager on Linux Mint, search for the system monitor and menu. Then see a task manager. It shows the processes and CPU consumption. Users can utilize it to view the CPU, memory, disk, and network usage, and kill, renice, or change the priority of any process.
In addition, users can manage the behavior as well as the appearance of “Task Manager” for their preferences. Task Manager is easy to access from the menu, the panel, or the keyboard shortcut. By using Task Manager, users can optimize the performance and stability of their Linux Mint system.
