
How to Install VirtualBox on Rocky Linux / AlmaLinux
VirtualBox is a popular and widely-used desktop virtualization platform that allows you to create and manage virtual machines. It is a type-2 hypervisor, implying that it needs to be installed on top of an operating system, unlike Type-1 hypervisors which can be directly installed on bare-metal servers. VirtualBox is absolutely free and can be installed on Linux, Windows, and macOS. In this guide, we will demonstrate how to install VirtualBox on Rocky Linux / AlmaLinux.
Step 1: Check if Virtualization is enabled or not
Before installing VirtualBox, you need to check if the virtualization feature is enabled on your system. The Installing Guide to VirtualBox on Rocky Linux will guide you through the process. As a type 2 hypervisor, VirtualBox requires Virtualization to be enabled. To verify whether your system supports virtualization, run the command:
$ grep -E -c '(vmx|svm)' /proc/cpuinfo
If virtualization is enabled, you should get a non-zero output. In our example, we have an output of 2, implying that virtualization is enabled. If this is not the case, reboot your system and access the BIOS settings whereupon you need to enable virtualization.
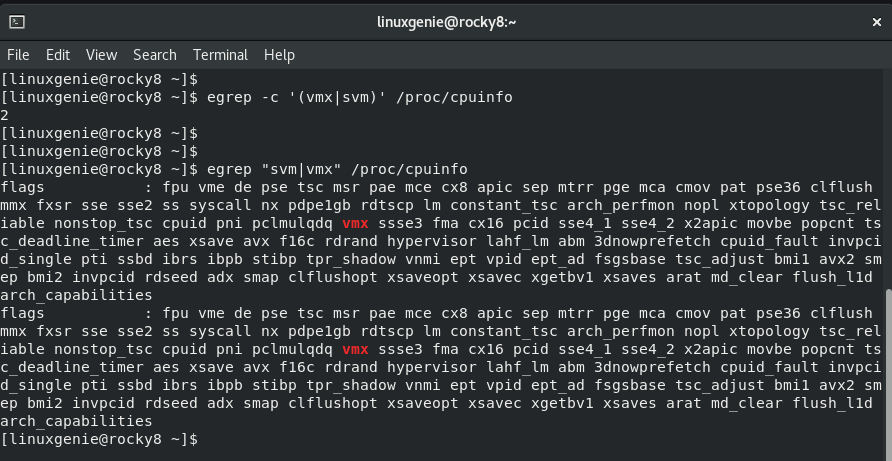
Additionally, you can check if virtualization is enabled by probing the virtualization extensions present in your system. For Intel, the extension will be represented by vmx and for AMD, this will be svm.
Therefore, run the following command:
$ egrep "svm|vmx" /proc/cpuinfo
From the output, Intel Virtualization is enabled.
Once you have established that virtualization is enabled, proceed to the next step.
Step 2: Install Development Tools
For the installation of VirtualBox to proceed smoothly, some additional development tools are required. But first, upgrade the system as follows.
$ sudo dnf update -y
Once all the packages are up to date, install the development tools, compilers and other requisite packages required along the way.
$ sudo dnf install -y kernel-devel kernel-headers gcc make perl elfutils-libelf-devel wget
Step 3: Enable VirtualBox Package Repository
Virtualbox is not officially available on Rocky Linux / AlmaLinux repositories. As such, the only avenue available is to install from the VirtualBox official repository.
To add the VirtualBox repository, first, download the public signing Key for RPM as shown.
$ wget https://www.virtualbox.org/download/oracle_vbox.asc
Once downloaded, add the key to your system as shown.
$ sudo rpm --import oracle_vbox.asc
Next, add the VirtualBox repository to your system.
$ sudo wget http://download.virtualbox.org/virtualbox/rpm/el/virtualbox.repo -O /etc/yum.repos.d/virtualbox.repo
Step 4: Install VirtualBox on Rocky Linux
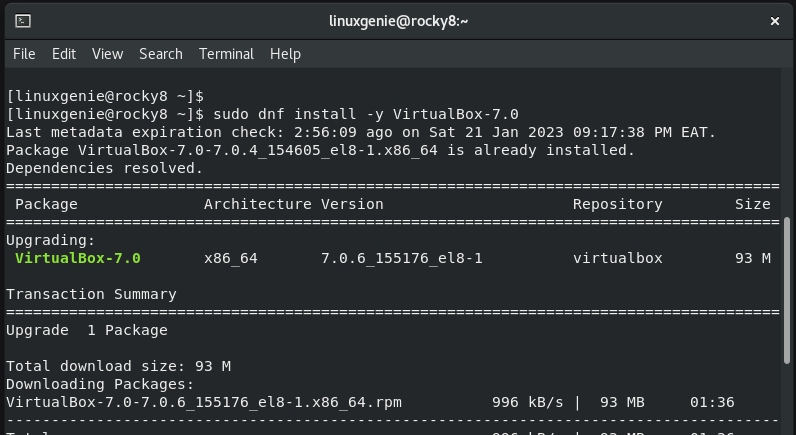
Once the Virtualbox repository has been added, install the latest version of VirtualBox. At the time of writing this guide, the latest version of VirtualBox is VirtualBox 7.0.
Install VirtualBox on Rocky Linux as shown.
$ sudo dnf install -y VirtualBox-7.0
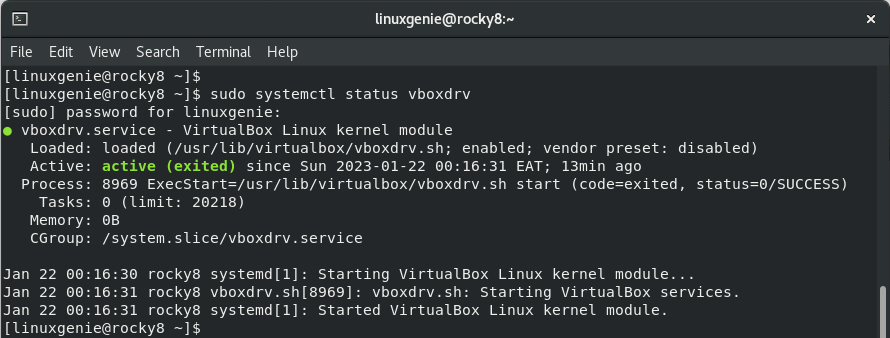
Once the installation is complete, confirm that VirtualBox is installed by checking its running status.
$ sudo systemctl status vboxdrv
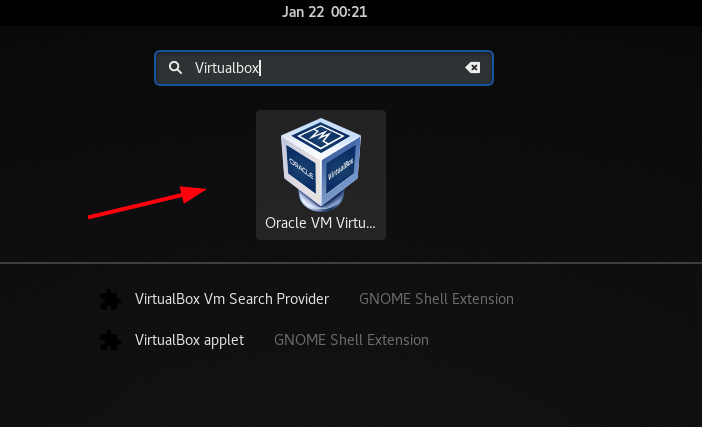
Step 5: Launching VirtualBox
To launch VirtualBox, use the application manager to search for it as shown.
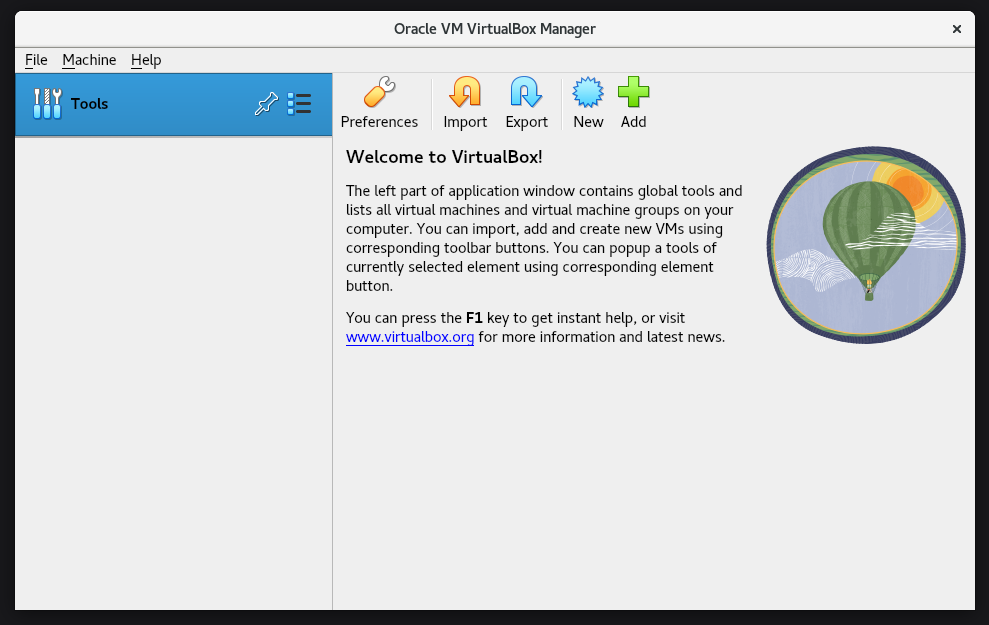
Once you click the icon, the Oracle VirtualBox manager user interface will be displayed as shown. From here you can create and manage virtual machines.
Step 6: Install Oracle VM Virtualbox Extension Pack
The VirtualBox Extension Pack extends the basic functionalities of VirtualBox and improves the overall user experience. For example, it allows physical USB device usage, host webcam usage, and disk image encryption in your virtual environment, to mention a few. It’s a handy software package that increases functionality in your virtual machines.
To install the VirtualBox extension pack, head over to the downloads page and download the latest extension pack. You can also use the wget command as shown.
$ wget https://download.virtualbox.org/virtualbox/7.0.6/Oracle_VM_VirtualBox_Extension_Pack-7.0.6a-155176.vbox-extpack
Once downloaded, install the extension pack using the following command
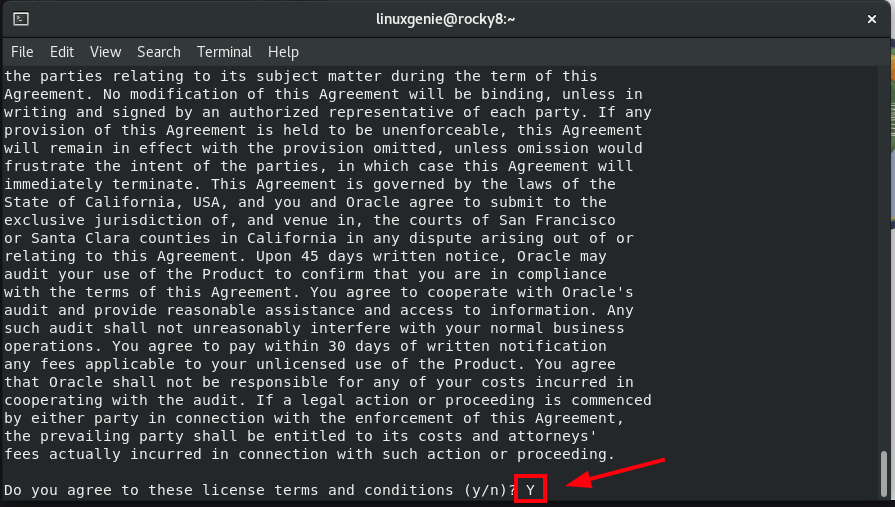
$ sudo VBoxManage extpack install Oracle_VM_VirtualBox_Extension_Pack-7.0.6a-155176.vbox-extpack
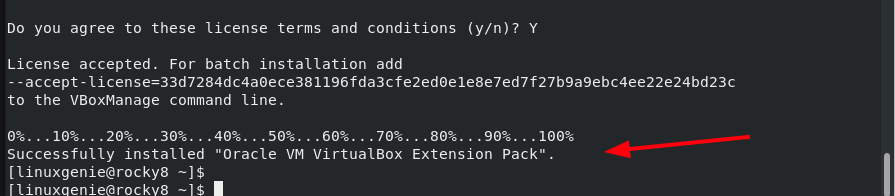
You will be required to accept the license terms. Press ‘Y’ on the keyboard and press ENTER.
Thereafter, the installation of the VirtualBox extension pack will be completed.
Conclusion
You can now start creating virtual machines and run various operating systems as guest machines using your freshly installed instance of VirtualBox. This draws this article to a close. Your thoughts and feedback on this guide are much welcome.
