
How to Add User on Ubuntu 22.04 Through the Terminal
Ubuntu, an enriched Linux system, allows strong terminal support to perform certain tasks as a general user or administrator. An administrator usually creates multiple users to grant specific permissions to each user. To create a user, there are numerous command line utilities supported by Ubuntu. Similarly, an already-created user can also be removed through the terminal.
In this post, we will demonstrate the methods to add and remove users on Ubuntu 22.04 through the terminal.
How to Add User on Ubuntu 22.04 Through the Terminal?
The user can be created in multiple ways, which will be discussed in this section. The “adduser” command in Ubuntu 22.04 is used to add a new user. The syntax of the command is provided below:
Syntax:
$ sudo adduser <username> |
The adduser is the keyword, whereas the <username> represents the name of the user. Now, the user is created in a group. The group will either be the same as the user’s name, or the group name can also be defined. Let’s practice these various methods.
Adding a User (With Default Group)
The following command will add a new user named “linuxgenie”. Since the group name is not defined, the group name will also be “linuxgenie”.
$ sudo adduser linuxgenie |
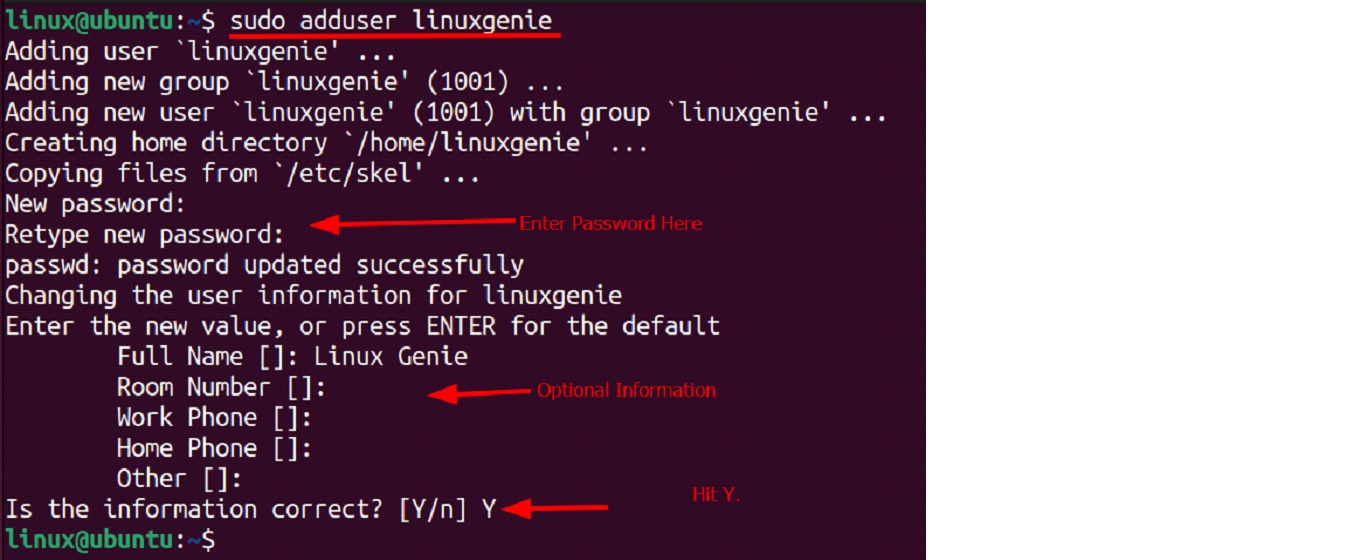
While the command is being executed, the following options are asked:
- Set and confirm a password for the user.
- After the password is set, other optional information can be set, such as full name, room number, work, home phone, etc.
- Lastly, hit the “Y” key to finish the user’s creation process.
To confirm the suer’s creation, use the below-stated command.
$ id linuxgenie |

detailed information about the user is shown, which includes the user id and username and then the group id and the group name. As we have not defined the group name, therefore, the group name is the same as of username.
Note: Multiple other commands can be utilized to confirm the user’s creation. Some of them are written below.
$ sudo cat /etc/passwd/ #scroll down at the end of the file, and you will find the user $ groups <username> #it will show the groups of the user |
Adding a User to a Specific Group
The “adduser” command can be used to add an existing user to a group or can create the group with the same name as that of the user. However, the ”useradd” command will also allow the user to create a new user and add it to a group.
For example, we have a group named “linuxgenie”. Now, we will add the user “genieuser” to the group “linuxgenie” using the command provided below:
$ sudo useradd -G linuxgenie genieuser |

To confirm the addition of the “genieuser” to the “linuxgenie” group, let’s execute the command written below:
$ id genieuser |
Adding a User to Sudoers Group
A normal user created using the “adduser” command cannot execute the commands that require administrative privileges. If we try to use “sudo” with the user, i.e., “linuxgenie”, the command won’t execute as can be seen below:
$ sudo apt update |

In the above screenshot, an error “linuxgenie is not in the sudoers file” had occurred. You need to add that specific user to the sudoers group to fix it.
Let’s add the user “linuxgenie” to the sudoers group via the command shown below (ensure that you are executing the command as a root user or the user that has sudo privileges):
$ sudo usermod -aG sudo linuxgenie |

The successful execution of the command shows that the user has been added successfully. It can be confirmed by checking the groups of the user “linuxgenie” by the following command.
$ groups linuxgenie |

The output shows that the “linuxgenie” user is added to the sudo group. To test it, switch to the “linuxgenie” user and try the update command.
$ su - linuxgenie $ sudo apt update |
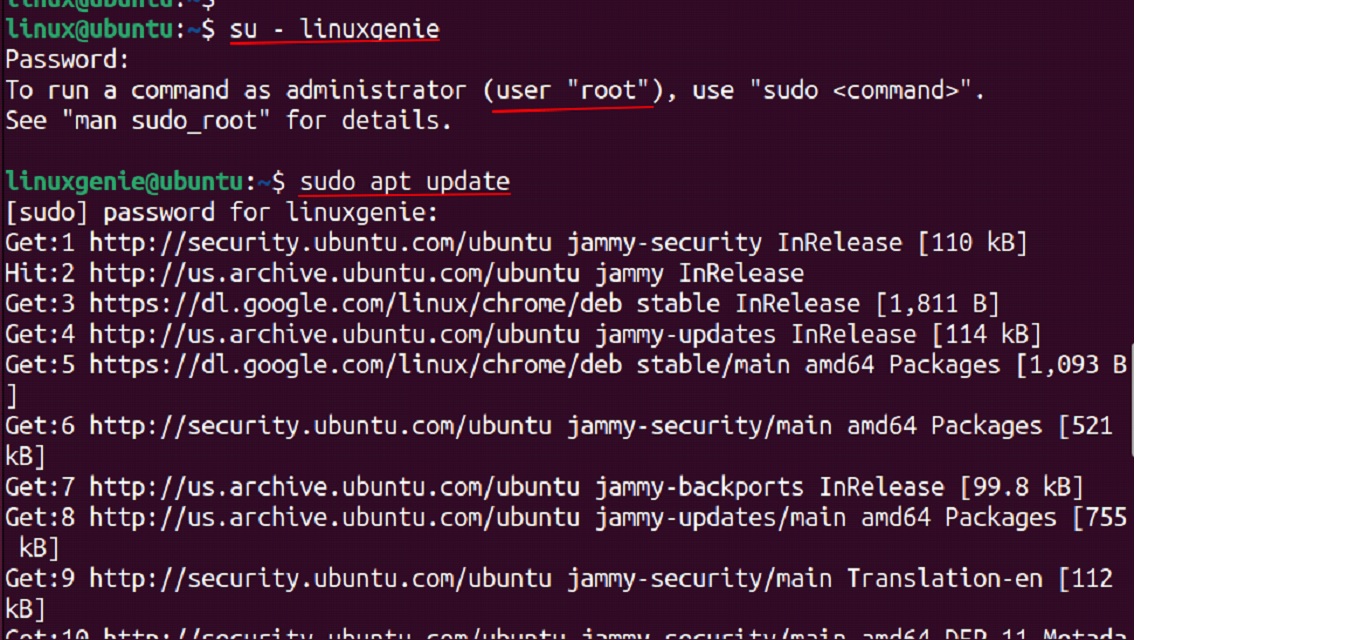
The output has shown that now the “linuxgenie” user is able to execute the command with “sudo” privileges.
How to Remove User on Ubuntu 22.04 Through Terminal?
The user can be removed using the terminal with the help of the “deluser” command. While using the “deluser” command, there are two possible scenarios:
- Either you are logged in as some other user and using sudo rights.
- Or you are running the command as a root user. The syntax of the “deluser” is provided as follows.
Here, we will use the command as a root user, and the example of using this is addressed below.
To Remove Only User
As an example, the command below will remove only the user “genieuser”.
# deluser genieuser |

The user is removed, and as there was only one member in the group “genieuser”, therefore; no member is left in the group.
To Remove the User and its Data
The “–remove-home” option of the “deluser’ command will remove the user “linuxgenie” and all its data (home directory and the files).
# deluser –remove-home linuxgenie |

The output confirmed that the files are also being removed alongside the user.
Conclusion
Ubuntu 22.04 strongly supports adding and deleting users using its terminal. The “adduser” command is used to add a user, and the “deluser” command can be used to delete the user. Apart from the user’s creation and deletion, this post has also explained how to add the user to a specific group and to the sudoers group for admin privileges.
